Showing posts with label bread. Show all posts

Wednesday, February 21, 2007

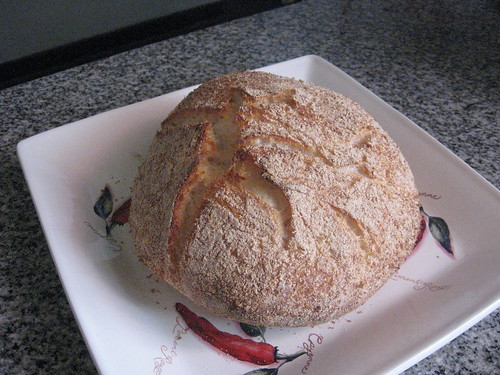
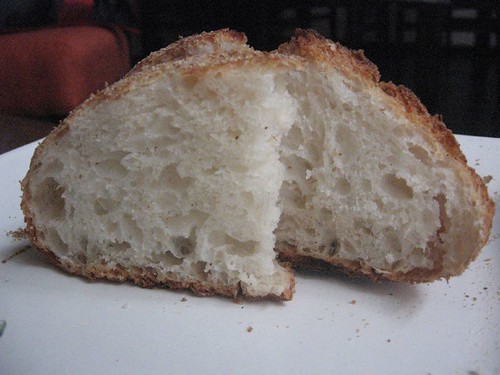
gruyere-serrano ham focaccia

I´ve only ventured into bread-making quite recently and I can´t believe it took me so long to jump in. I mean, there must be something inherently scary about yeast, you know, all the fears about "killing it", no wonder people are scared of bread if they choose those words to describe the process!
First, I tried my hand at pizza, then I did a white batter bread which turned out beautifully, and was so happy with it I did repeats for different people quite a few times... oh, the bread-maker´s ego.
I even jumped in the no knead bread bandwagon.
There was only one way to feed my new addiction: buy a bread-making book. Which I did a few weeks ago. I chose this book by an Argentine specialist I had seen on tv a few years ago and marvelled at the "foaminess" of his creations.
There are 145 recipes, so I will have plenty of stuff to keep me entertained, but the first recipe I chose was a gruyere cheese-serrano ham focaccia.

gruyere cheese-serrano ham focaccia

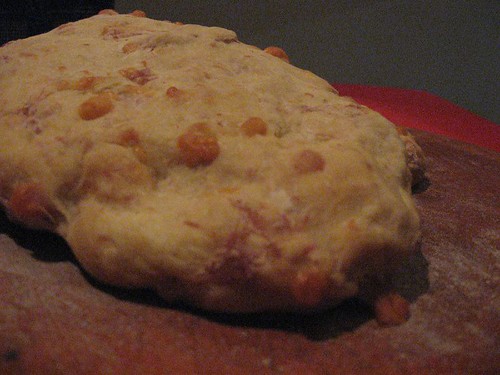
I usually know whether a recipe will succeed or not just by looking at the ingredients list. In this case: gruyere + ham = deliciousness.

Plus, the recipe was pretty easy and it yields 4 loaves, so I knew I probably would have 2 loaves left over from my dinner party that I would freeze and recycle for future dinners.

gruyere cheese-serrano ham focaccia

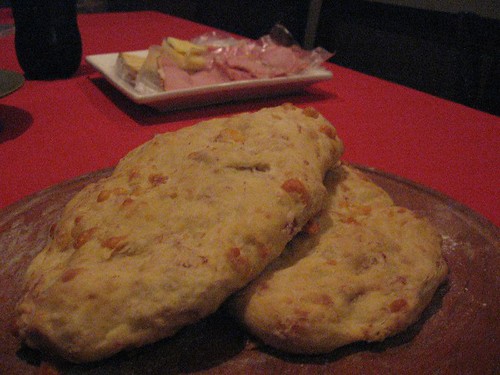
I wasn´t disappointed, the only slight problem was that the ham was a bit salty for my taste (then again, I´m used to eating with very little salt because my dad has high blood pressure so salt is pretty much non-existent at my parents´). So try your ham first and adjust the amount of salt you add to the dough accordingly.

You can also use the recipe as a base and exchange the ham for sun-dried tomatoes for instance. Just think of things you would like to find in there and you are set to go.

gruyere cheese-serrano ham focaccia

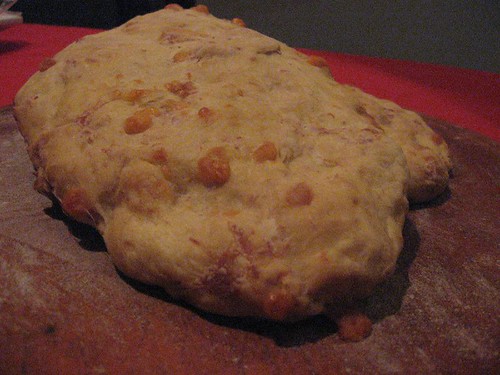
Gruyere-serrano ham focaccia (from 145 Recetas de panes y facturas by Marcelo Vallejo)

All-purpose flour (here it is called 0000), 500 grams (1.1 pounds)
Salt, 2 teaspoons
Fresh yeast, 25g (around 10g of instant yeast, 2 teaspoons)
Water, 300cc (around 10oz)
Egg, 1
Unsalted butter, 2 tablespoons
Serrano-style ham, 125g (around a 1/4 pound)
Gruyere cheese, 125g (around a 1/4 pound)
Extra-virgin olive oil (to brush the bread)


Yield: 4 loaves

1. Place the flour and the salt in a bowl. Make a hole in the middle and put the yeast, the lukewarm water, the egg and the softened butter there. Mix slightly.
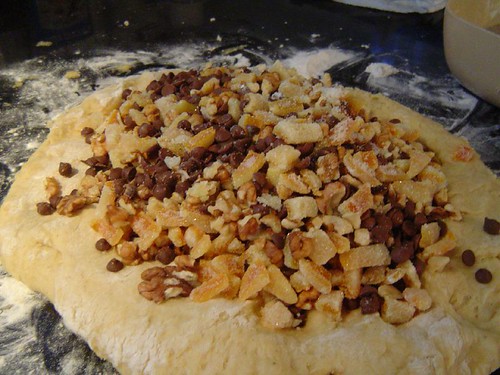
2. Chop the ham slices thinly and the cheese into tiny squares. Add to the dough.
3. Knead until you get a soft, homogeneous dough (about 3-5 minutes).
4. Put back in the bowl and cover with plastic wrap. Let it rest for 30 minutes.
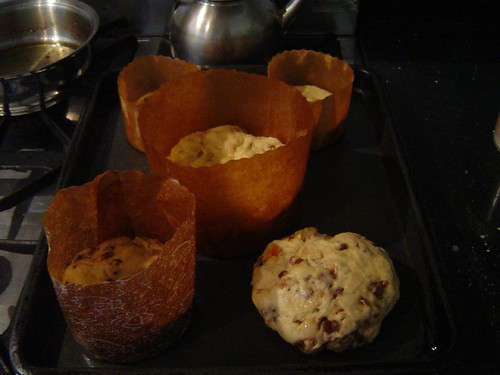
5. Divide the dough into 4 rolls. Cover and let the balls rest for 15 minutes.
6. Pull out each ball with your hand, giving it an oval or rectangular shape. They should be about 1cm thick.
7. Place them on oiled pans. Brush the top of each loaf with extra virgin olive oil. Cover and let them double.
8. Preheat the oven to 180°C (350°F).
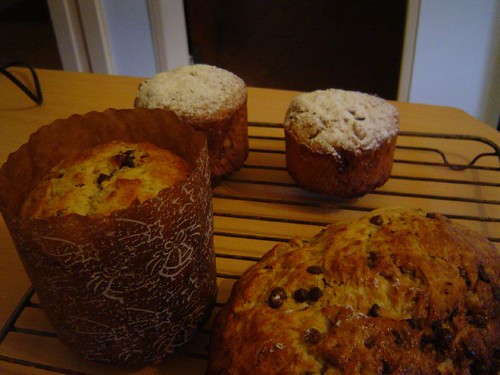
9. Bake for 30 minutes. Serve warm.

Friday, December 29, 2006

at long last... the panettone recipe

What a hectic week! Between Xmas, the puppies and catching up with work, it´s been hard to even think about writing an entry, typing the recipe and translating it.
But it´s about time I do it, otherwise, I´m gonna forget important details about the process and you´ll all end up with a crappy "pan dulce" lol
For those of you who missed the previous entries, I made a Xmas panettone with a twist on Saturday. The typical panettone (at least around here) has all types of nuts and crystallized fruits. There are two main types: the "pan dulce milanés" (panettone from Milan) and the "pan dulce genovés"(Panettone from Genova). The first is baked in a special paper mold and ends up with a mushroom-like shape, and the second one is baked without a mold and ends up with a loaf-like shape.
I went for the "milanés" shape:
panettone
Though here you see one of the Genova variety (right) because I ran out of molds lol
panettone

The personal twist comes in the filling. I have never ever liked store-bought crystallized fruits, they all taste the same, and it´s not a good taste anyway. I do like most nuts, but the problem with panettones which just have nuts is that it ends up being way too dry.
Another personal neurosis of mine is orange flower water, which is typical of our "pan dulce". I just can´t find myself enjoying that weird aftertaste.
So, in view of all this pickyness, I decided to make my own panettone suited to my taste... if not everyone else´s haha
I used homemade orangettes, nuts and chocolate chips and I added a bit of cinammon to the dough. The end result was loooooooovely, moist and totally yummy. If you don´t trust me, check it out... or better yet, make it yourself, it´s easy, trust me.

panettone dough

panettone

panettone

panettone

And, as you see, you get a big one, two medium ones and two little ones, so you get a lot for your work. I´m sure they would freeze well, but if you don´t wanna freeze them and you have some left over after 3 or 4 days...
you can make a kind of French toast with it!!!! so very yummy, I just added some cinammon and vanilla, and 2 tablespoons of sugar to an egg-milk mix, soak slices of panettone in it, fry it with a bit of butter in a pan, and voilá. I poured a bit of maple syrup over it.
I can´t recommend it enough.
For visual evidence:

panettone French bread

Ok, after typing this loooooooooooong recipe in two languages, I think I deserve tons of comments hahahaha pretty please? ;)


Panettone (adapted from a recipe by Dolly Irigoyen)

Yeast proofing: fresh yeast (40 grams), sugar (1 T), milk at room temperature (1/2 cup), all purpose flour (1/2 cup).

1. Mix and let it rise covered till it duplicates its volume.

Dough: all purpose flour (600 grams, and 1 extra cup or so to work with the dough after letting it rise), softened butter (200 grams), salt (a pinch), sugar (150 grams), grated lemon and orange rind (to taste, around 4 teaspoons), eggs (5), cinammon (2 teaspoons), vanilla extract (2 teaspoons), malt extract (1 tablespoon, if you can´t get any, use honey).

1. Mix a little and then add the yeast proofing. Mix and knead to form a homogeneous dough.
The dough should be moist, but shouldn´t stick to your hands.

2. Let rise till it doubles its volume.

3. Flatten and incorporate the fruit, nuts and chocolate chips (the total amount can´t be over 600 grams overall). I used 300 grams of chocolate chips, 200 grams of orangettes and 100 grams of nuts.

4. Form balls and place them in buttered panettone molds (it yields 1 large, 2 medium and 2 small). If you don´t have the molds, do them without them.

5. Let them rise till they duplicate their size.

6. Brush with melted butter and then with egg. Cut a cross on top with a razor or a good knife.

7. Bake at 180C (350F) for 60-70 mins for the big one, around 45 for the medium ones and 25-30 for the small ones.

8. Sprinkle with powdered sugar when it is still hot or pour glase over it (I used a lemon-powdered sugar glase).


Pan dulce (receta adaptada a partir de la dada por Dolly Irigoyen en www.elgourmet.com)

Esponja: 40 gramos de levadura fresca, 1 cda de azúcar, 1/2 taza de leche a temperatura ambiente, 1/2 taza de harina común.

Mezclar, tapar y dejar duplicar.

Masa: harina común (600 gramos), manteca pomada (200g), 1 pizca de sal, azúcar (150g), ralladura de naranja y limón, huevos (5), canela (2 cditas, también se puede usar agua de azahar si se quiere), escencia de vainilla, extracto de malta (1cda., reemplazar por miel si no se consigue).

1. Mezclar un poco y después agregar la esponja.

2. Mezclar o amasar hasta formar una masa homogénea y húmeda, pero que no se pegue a las manos.

3. Dejar levar hasta que duplique su volumen.

4. Desgasificar e incorporar frutas (esta cantidad de masa aguanta un máximo de 600 gramos de relleno). Yo usé naranjitas confitadas (200 g), chips de chocolate (300 g) y nueces (100g).

5. Armar bollitos y ponerlos en moldes de pan dulce enmantecados (rinde 1 grande, 2 medianos y 2 chicos).

6. Dejar levar hasta duplicar.

7. Pincelar con manteca derretida y después con huevo. Hacer corte en cruz con gillete o cuchillo bien filoso.

8. Hornear a 180C (350F) (alrededor de 60-70 minutos el grande, 45 minutos los medianos y 25-30 minutos los chicos).

9. Espolvorear con azúcar impalpable en caliente o bañar con glasé (yo usé glasé de jugo de limón y azúcar impalpable) o fondant.

Saturday, December 23, 2006

new traditions

I finally got around to making the panettone today. I´ll post all of the details probably tomorrow during the day, but I wanted to leave you with pictures of the magic process it entailed.
Lovely stuff, if I had known it was pretty easy to make it, I would have given it a try way sooner!!!

panettone

panettone

Saturday, December 09, 2006

no-knead bread, part two

In case you haven´t heard about it, there´s a second part to Mark Bittman´s no-knead bread article with different options to tweak the recipe a little bit, different flavors that can be added and when, and responses to questions he received.

Some of the things that I found most interesting are the possibility to add different flours in small porcentages to give it something extra (I had originally used rye and semolina for the crust and it worked great).

"Up to 30 percent whole-grain flour works consistently and well, and 50 percent whole-wheat is also excellent. At least one reader used 100 percent whole-wheat and reported “great crust but somewhat inferior crumb,” which sounds promising. I’ve kept rye, which is delicious but notoriously impossible to get to rise, to about 20 percent. There is room to experiment."

One of the things that needed improvement in my loaf was flavor (though my main complaint was lack of humidity.) He mentions the fact that the amount of salt can be increased and he also gives some ideas for different flavorings.

"FLAVORINGS The best time to add caraway seeds, chopped olives, onions, cheese, walnuts, raisins or whatever other traditional bread flavorings you like is after you’ve mixed the dough. But it’s not the only time; you can fold in ingredients before the second rising. "

I would personally add some chopped confit tomatoes and chopped basil, but the possibilities are pretty much endless.

Another thing worth noticing is the fact that the 70F temperature is not something mandatory... you just need to adjust the rising time accordingly if it is hotter or colder.

I´m gonna try this again soon with some changes in the hot summer weather and see how it turns out. If you haven´t tried this bread, please do, it is easy and the results are really good. If it at least helps erase some fears about bread baking, then I think it is a true success.

Wednesday, November 15, 2006

the bread "not knead around the world"

For anyone recently addicted to food blogs like myself, this has been an eventful week. See, the New York Times published a bread recipe last Wednesday that had everyone quite excited... including me.
It´s a no-knead bread recipe invented by Jim Lahey from the Sullivan Street Bakery in NY which involves tiny amounts of instant yeast and huge amounts of rising time. And of course, it doesn´t require any kneading.
At first, I was quite afraid of trying it out because even turning on the oven is quite a feat in Buenos Aires these days. Summer temperatures are here in all their "glory", so the natural thing to do is to stay away from anything that could increase the heat even more.
Yet, after seeing gourgeous pictures of said bread from several bloggers and hearing endless praise for this seemingly miraculous piece of culinary art, I decided to disregard my already-defeated common sense and go ahead with this whole thing.
Having tried my hand at bread and pizza dough before, I´m not afraid of kneading. In fact, I like to knead... and recommend it to anyone having a bad day, you say therapists, I say bread making!
Thus, the preparation itself wasn´t scary at all. It did require more waiting than usual, but I got this amazing loaf out of it.
Now, when it actually came down to slicing the bread, it was drier than what I anticipated. It was still gorgeous and full of air, but a bit dry for my liking. Granted it doesn´t contain any fat, but I think the real culprit could be the fact that I had to use a Pyrex (the article mentioned it as one of the possibilities), instead of a heavy iron pot, because even though I do have one, it´s for stove-top cooking since the handles are made of a plastic material. My theory is that the closure isn´t as tight, so some humidity might have been lost there.
I still recommend this bread. In fact, I´m gonna give it another shot soon with some minor modifications and see how it goes. If any of you have made it and want to share your experience, give me some tips or whatever (that is, assuming someone actually reads this thing), please do so in the commentaries section or writing to my email address.

Here´s my lovely loaf (I´ll update tomorrow with some more pictures.)
behold the loveliness

...

As I had promised, here are some other pics.

sponge

A nice afternoon snack:
IMG_0242

It is coming to get you!!!
come to mama


No knead bread (from the NYT Dining Section, nov 8th, 2006.)

Yields one 1 1/2 pound loaf
3 cups all-purpose or bread flour, more for dusting
¼ teaspoon instant yeast
1¼ teaspoons salt
Cornmeal or wheat bran as needed.

1. In a large bowl combine flour, yeast and salt. Add 1 5/8 cups water, and stir until blended; dough will be shaggy and sticky. Cover bowl with plastic wrap. Let dough rest at least 12 hours, preferably about 18, at warm room temperature, about 70 degrees.

2. Dough is ready when its surface is dotted with bubbles. Lightly flour a work surface and place dough on it; sprinkle it with a little more flour and fold it over on itself once or twice. Cover loosely with plastic wrap and let rest about 15 minutes.

3. Using just enough flour to keep dough from sticking to work surface or to your fingers, gently and quickly shape dough into a ball. Generously coat a cotton towel (not terry cloth) with flour, wheat bran or cornmeal; put dough seam side down on towel and dust with more flour, bran or cornmeal. Cover with another cotton towel and let rise for about 2 hours. When it is ready, dough will be more than double in size and will not readily spring back when poked with a finger.

4. At least a half-hour before dough is ready, heat oven to 450 degrees. Put a 6- to 8-quart heavy covered pot (cast iron, enamel, Pyrex or ceramic) in oven as it heats. When dough is ready, carefully remove pot from oven. Slide your hand under towel and turn dough over into pot, seam side up; it may look like a mess, but that is O.K. Shake pan once or twice if dough is unevenly distributed; it will straighten out as it bakes. Cover with lid and bake 30 minutes, then remove lid and bake another 15 to 30 minutes, until loaf is beautifully browned. Cool on a rack.