Showing posts with label sweet. Show all posts

Saturday, February 10, 2007

How to get a nice suntan

Yes, I do know it´s still winter in the northern hemisphere, but this entry isn´t strictly about suntans... it´s more about carrots. Don´t worry, I´m not going to write a full entry about a carrot salad, more like a fantastic carrot cake.
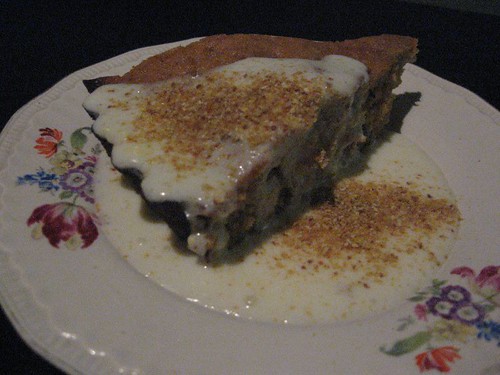
carrot cake with cream cheese frosting and lemon powder

Thing is, I love carrot cakes, yet I had only eaten them twice in my whole life. Here in Argentina they are pretty much unheard of, in fact, some people might think it odd to use carrots in a dessert. That´s actually what I thought when I was offered a piece of carrot cake with hazelnuts in Zurich back in mmmm 1997. But, since the tour we had booked included that dinner and the other choices for dessert were kind of blah, I thought to myself "what the hell" and ordered it. It was incredibly moist and packed with flavor and I rejoiced in every single bite. Yet when it was over, I had no way to replicate it (oh, Internet, how I love thee). Until I saw a recipe for it on tv and tried it... I didn´t love it as much, which is what usually happens when you have years and years to fantasize about and remember a particular dish... pretty much a recipe for disaster.

But after seeing the amazingly moist cake Brilynn came up with the other day, I just knew it was time to let go of fear and give carrot cakes another try... I mean, I can´t justify another trip to Switzerland just to have some carrot cake, right? well, now that I think about it, maybe I could...

I was all set to make it, yet I was missing some key ingredients for this particular recipe (like shredded coconut), so I decided to put it on hold for a while. Fate intervened in the form of the arrival of a new cookbook I had ordered online, which coincidentaly had a carrot cake recipe in it.
I did have to use dried apricots instead of white raisins, but that was pretty much all the tweaking I did. This is definitely one of those recipes that actually taste better the second day because the flavors get more intense as time goes by. And the cake is really moist so there´s no need to worry about it getting too dry.
I apologize for the crappy pictures, but I made the cake at night so the light wasn´t working for me. But, please trust me on this one, disregard the pictures and go for it, it´s a really easy recipe which tastes remarkably well... and can help you with your tan... what more can you ask for?
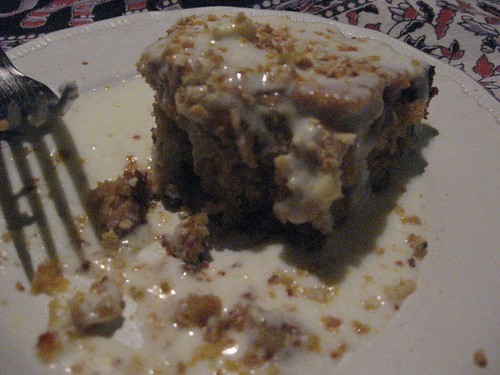

carrot cake with cream cheese frosting and lemon powder


Lemon/orange powder

As you might have noticed, there is a yellow "powder" sprinkled over the frosting. Well, that´s a great tip I discovered thanks to my new book: lemon/orange powder. It is really simple and can really add to the presentation (and flavor) of many dishes. You simply peel some oranges or lemons with a potato peeler (trying not to get much of the white peel), put the peels in glass container and cover it with a lid (or with plastic wrap) and microwave it on maximum for 6 minutes (they say 6 minutes for the peel of 4 oranges, just adjust using your common sense, they peels should dry out). Let the peels cool for a few minutes and then grind them in the food processor until you get a nice powder.

Carrot cake (adapted and translated from La cocina de Mauricio y Eduardo)
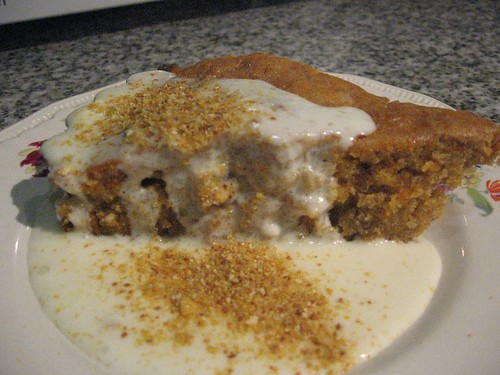
carrot cake with cream cheese frosting and lemon powder

Ingredients:

Conversions from this great site.

Eggs 2
Sugar 1 cup
Honey 100 grams (around half a cup)
All-purpose flour 210 grams (a little less than 1/2 a pound)
Baking powder 1 teaspoon
Ground cinammon 1 or 2 teaspoons
Nutmeg 1 teaspoon (I didn´t have any so I didn´t use it, it could work really well though)
Salt 1/2 a teaspoon
Corn oil (or canola oil) 160cc (5.6 ounces)
Finely grated carrots 1 1/2 cups
White raisins (or dried apricots or whatever you have you think could work) 1 cup
Pecans or walnuts 1 cup

Preparation

1. Whisk the eggs with the sugar and the honey using an electric mixer at medium speed for 2 or 3 minutes.
2. Incorporate the previously sifted flour, salt, baking powder, cinnamon and nutmeg to the egg mix. Add the oil.
3. Add the carrots, the nuts and the raisins/dried apricots.
4. Pour into a previously buttered/floured pan (I used a fluted pan of around 24 centimeters of diameter).
5. Cook in a 170°C/340°F oven for around 35 minutes (mine was done after 20 minutes, which might mean it was too hot or that they use a smaller pan and get a taller cake).
Monday, January 29, 2007

a bit of chai... and quite a bit of playing by ear

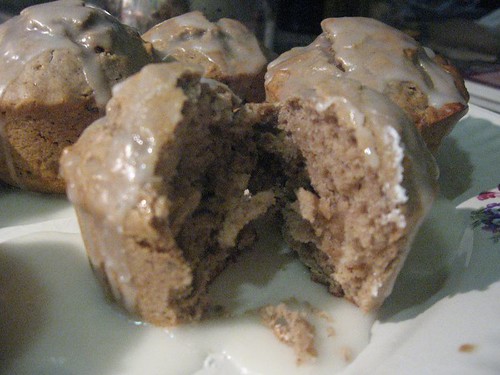
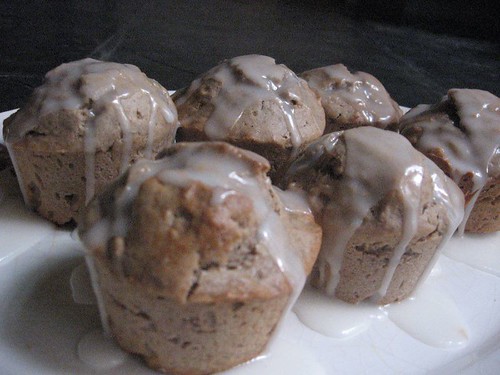
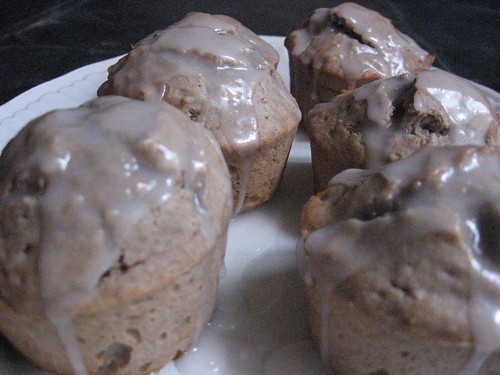
chai muffins with lemon glaze

Last week, in the midst of the work kaos I´m currently drowning in, I decided to play it cool and spend the whole afternoon experimenting in the kitchen. One of the best ways to release stress for me is cook exactly what I´m craving (I did say "one").
And, as it happens quite often, relaxation equals something sweet, and something having to do with chai tea.
I fell in love with chai in my second visit to the US, at Borders to be more precise. I bought a travel coffee mug and they gave me a free drink with the purchase. I had seen frozen chai latte there before, it was summer and I was stuffed after eating at the Olive Garden (I know, I know, it´s probably not the best restaurant on earth or anything, but I was in Tulsa, so my selection wasn´t endless, and I was pretty homesick after a month there, so Italian food = home). Anyway, they didn´t have the frozen chai, but they did have chai, so I went for it. I´ve never looked back, I was hooked instantly: the perfect balance of sweet and spicy, and all the fragrances. I started drinking it like there was no tomorrow, yet there was a tomorrow, and the tomorrow was here in Argentina... which is truly great in many ways... but it was chai-less... and the mere thought of a chai-less existence was hard to bear.
Over-dramatic? That description? Come on!
But anyways, who saved me from utter chai-withdrawal was my "friend" Narda Lepes again. For some reason, she decided to do a homemade chai recipe on her show, and I was instantly hooked. Some cloves, cardamom, fresh ginger, cinammon sticks and black tea and I was good to go. Later on, I was able to get this chai here

my beloved chai

... but the flavors aren´t as strong as that first Borders chai who first enamoured me or the homemade chai I sometimes indulge in.
But last week, I wasn´t going to settle for chai as is, no, no, I needed chai in a different package... and that package ended up being cute little muffins with a lemon glace.
I altered a simple muffin recipe so that I could end up simmering cream with all the chai spices and voilá, chai muffins.

chai muffins

The result was fantastic, but I don´t think it makes sense to share my somewhat complicated "recipe", because you guys have chai syrups readily available, so you can just take a simple vainilla muffin recipe, add a bit of syrup, and you have amazing chai muffins. Those of us living at the world´s rear end have to make do without Amazon and without chai syrup... but we´ll persevere, despite this uphill struggle hahahhaa I think all this work is catching up with my brain and my sense of drama.

chai muffins with lemon glaze

And a few other photos before I go to bed to get my well-deserved rest. This is another one of the "creations" that came out of my tired little brain that day.

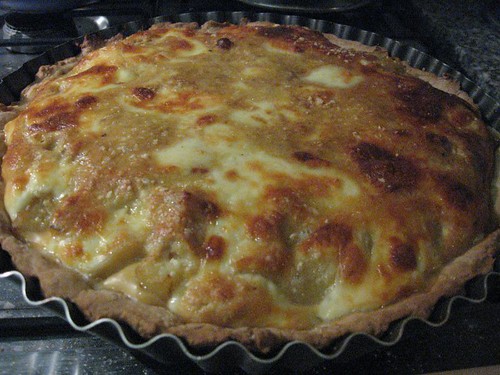
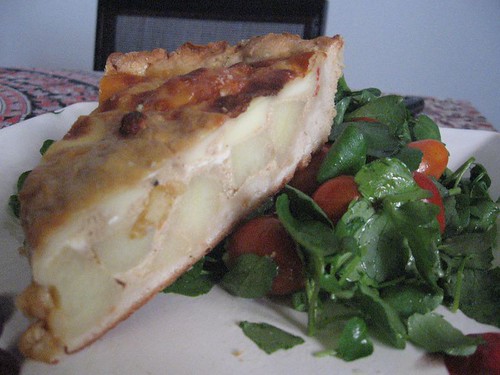
It´s a potato-onion soup-cheese quiche I created to reinvent a French onion soup that was way too strong to eat as such:

onion soup-potato quiche

Just what people in low-carb diets need!!!

onion soup-potato quiche

Good night everyone :)

Wednesday, January 24, 2007

oh... world peace is so lovely

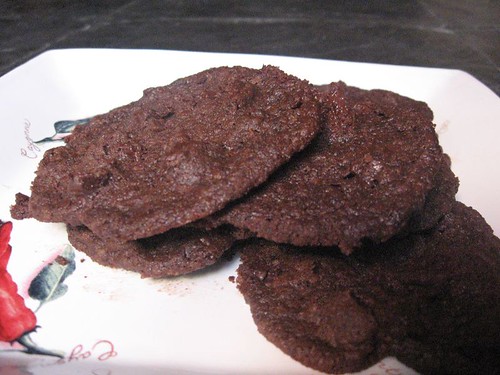
I know, I´ve been a bad, bad blogger. I´ve been teasing you about the famous world peace cookies forever. Thing is, when I made the first batch, they were a little thin, so I was waiting for my eventual surrender to the freezed log to try them again and see if they would end up any thicker.

world peace cookies... first batch

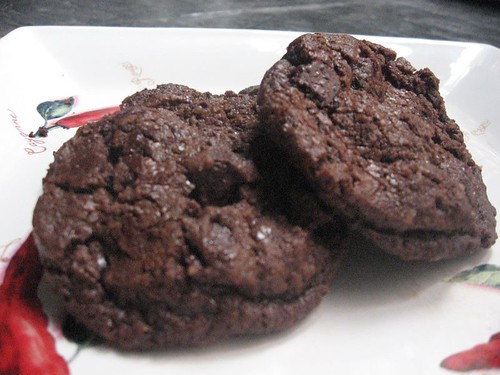
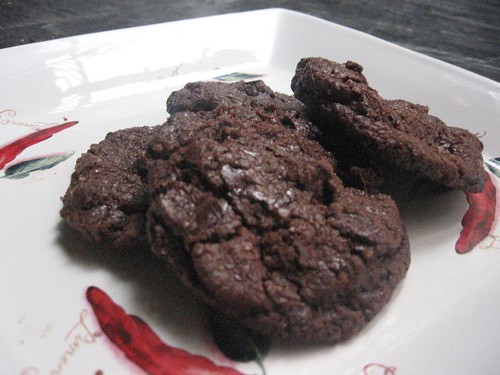
And I´m pleased to say they did.

World peace cookies... second batch

Now look at that sturdy little pile of chocolate... I think I´m in love.

IMG_0624

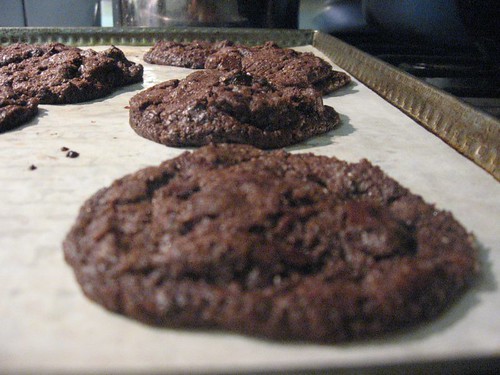
Sorry, momentary lapse... Now, going back to the beginning. In case you haven´t heard about this cookies. They were developed by Pierre Herme and reprinted by Dorie Greenspan (in that lovely book of hers I can´t wait to get my hands on, but thanks to food bloggers I can get to enjoy some recipes in the meantime). The technique is fairly simple... what is hard is to wait for the full 3 hours of refrigerating they suggest you wait before you bake the cookies and the wait till they chill a bit... that´s just mean of them. Seriously, could you resist this?:

cooling

Confession time: for the first batch, I just refrigerated the dough for around 1 1/2 hours, which was probably why they ended up thin because they spreaded way too much.

One thing that could be improved in my rendition of the cookies was the sugar... they ended up a bit too sweet at times, though the "problem" was easily fixed by eating them with a tall glass of milk, yum! But I think it was I didn´t use fleur de sel, and the bit I used of sea salt wasn´t as noticeable as I´ve read it was in other blogs.

Either way, they are very, very, and I mean VERY good, so you should definitely try them if you haven´t already.

Since my pictures didn´t turn out as great as they could, I recommend you check out these other entries about these cookies with lovely pictures and great posts.
Smitten: In which world peace eludes me
Milk and cookies: Spotlight on World Peace cookies


World Peace/Korova Cookies Paris Sweets, Dorie Greenspan (also reprinted in "Baking: From my home to yours")

1¼ cups all-purpose flour
1/3 cup unsweetened cocoa powder
½ teaspoon baking soda
1 stick plus 3 tablespoons (11 tablespoons) unsalted butter, at room temperature
2/3 cup (packed) light brown sugar
¼ cup sugar
½ teaspoon fleur de sel or ¼ teaspoon fine sea salt
1 teaspoon vanilla extract
5 ounces bittersweet chocolate, chopped into chips, or a generous ¾ cup store-bought mini chocolate chips

Makes about 36 cookies

1. Sift the flour, cocoa and baking soda together.
2. Working with a stand mixer, preferably fitted with a paddle attachment, or with a hand mixer in a large bowl, beat the butter on medium speed until soft and creamy. Add both sugars, the salt and vanilla extract and beat for 2 minutes more.
3. Turn off the mixer. Pour in the flour, drape a kitchen towel over the stand mixer to protect yourself and your kitchen from flying flour and pulse the mixer at low speed about 5 times, a second or two each time. Take a peek — if there is still a lot of flour on the surface of the dough, pulse a couple of times more; if not, remove the towel. Continuing at low speed, mix for about 30 seconds more, just until the flour disappears into the dough — for the best texture, work the dough as little as possible once the flour is added, and don’t be concerned if the dough looks a little crumbly. Toss in the chocolate pieces and mix only to incorporate.
4. Turn the dough out onto a work surface, gather it together and divide it in half. Working with one half at a time, shape the dough into logs that are 1 1/2 inches in diameter. Wrap the logs in plastic wrap and refrigerate them for at least 3 hours. (The dough can be refrigerated for up to 3 days or frozen for up to 2 months. If you’ve frozen the dough, you needn’t defrost it before baking — just slice the logs into cookies and bake the cookies 1 minute longer.)
5. GETTING READY TO BAKE: Center a rack in the oven and preheat the oven to 325 degrees F. Line two baking sheets with parchment or silicone mats.
6. Working with a sharp thin knife, slice the logs into rounds that are 1/2 inch thick. (The rounds are likely to crack as you’re cutting them — don’t be concerned, just squeeze the bits back onto each cookie.) Arrange the rounds on the baking sheets, leaving about 1 inch between them.
Bake the cookies one sheet at a time for 12 minutes — they won’t look done, nor will they be firm, but that’s just the way they should be.
7. Transfer the baking sheet to a cooling rack and let the cookies rest until they are only just warm, at which point you can serve them or let them reach room temperature.

SERVING: The cookies can be eaten when they are warm or at room temperature.

STORING: Packed airtight, cookies will keep at room temperature for up to 3 days; they can be frozen for up to 2 months.

Saturday, January 06, 2007

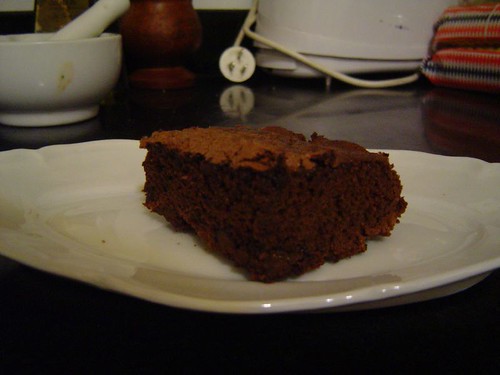
my staple brownie recipe

If there´s one recipe that has brought me great joy and never steered me wrong, this would be it.
It is one of the first things I baked completely on my own, without having eaten brownies before (for some reason, brownies hadn´t become popular in Argentina yet, now they are in every café´s menu). I was watching one of my favorite cooking shows back then, it must have been at least ten years ago... and I immediately realized that this was something in between cakes and cookies... and I´ve always been partial to cookies in this classic antagonism of cookie vs. cake. So, going back to the story, the brownies looked so damn chocolatey and moist that I couldn´t resist the urge to make them: just as a judge, of course, I was planning to have a single brownie and stop at that... yeah, right.

Needless to say, I became addicted to them, which is a very very bad thing since I always have the ingredients to make a fresh batch. That is one of the great things about this particular recipe: you don´t need to add chocolate, just cocoa, so chances are, you will always have the ingredients at hand.

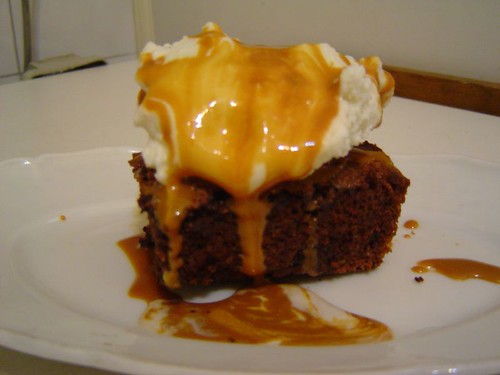
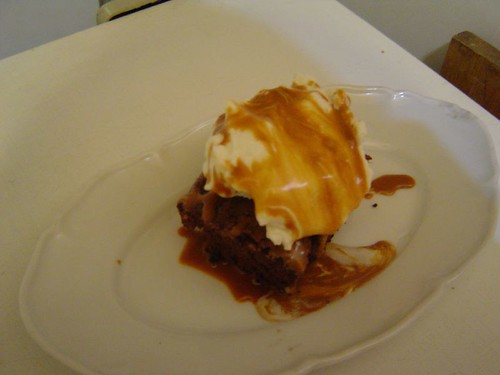
There´s even a myth that says that one night a few years ago, we were talking after dinner and I suddently got the urge (and I mean true urge) to eat brownies. Not only brownies, the urge was more specific, it was brownies topped with dulce de leche and vanilla ice cream, talk about high-maintenance! Anyway, and again, according to this myth, I quickly prepared a batch, dispached my brother to buy ice cream and we were eating warm brownies with dulce de leche and ice cream 40 minutes later. Sin never tasted so good!!!

This would be a recreation of that moment:

brownie with dulce de leche sauce and ice cream

Whenever I have that sort of urge (whether it is hormonally-induced or fat-soul-induced), I bake a batch of these, make some capuccino and burst with happiness for the rest of the day.

So it´s no surprise that I made them with dulce de leche sauce and ice cream for new years eve and they were a big hit.

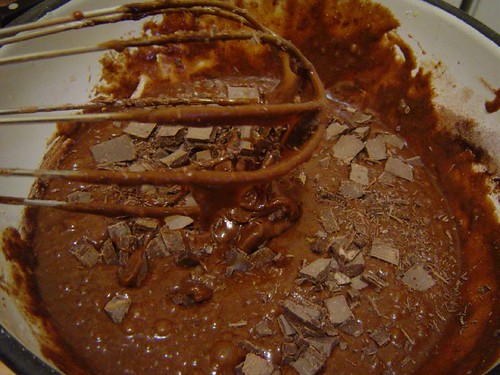
Of course, I documented the whole thing so that you could witness the whole process.

*drool*

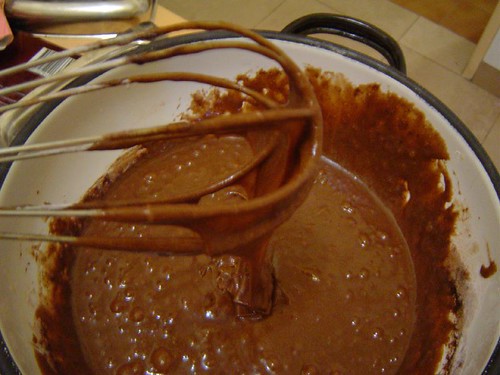
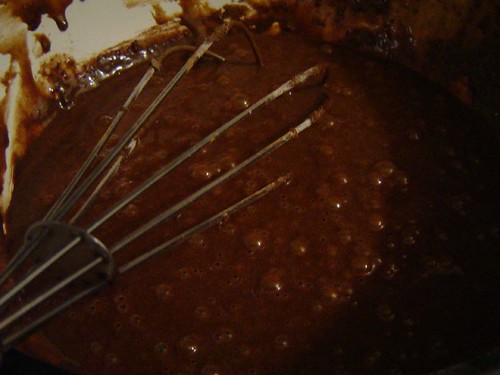
mmmmm bubbles

mmmm bubbles

wouldn´t you want to stick your finger in there?

brownies

and a dulce de leche river

dulce de leche river

Fool-proof brownies (adapted from an original recipe by Maru Botana, to my Argentine readers, stop laughing!!! she wasn´t that bad back then!)

Melted butter (100 grams or 3.5 oz)
Granulated sugar (1 1/2 cups)
Eggs (4)
All-purpose flour (1 cup)
Baking powder (1 teaspoon)
Cocoa (1 1/2 cups, I use semi-sweet cocoa, Nesquick, to be more precise)
Vanilla extract (1 teaspoon)
Cinnamon (1 teaspoon) *
Bittersweet chocolate (to taste, I use around 100grams, 3.5 oz) **

1. Melt the butter in the microwave at 60% for 1 minute or so. Mix with the sugar using a metal whisk and then add the eggs one by one.

2. Mix the flour with the baking powder and the cocoa and mix with the batter. If you are adding cinnamon and chocolate (optional), this would be the time to add them

3. Preheat the oven to 180C or 350F.

4. Pour in buttered and floured rectangular pan (I generally use a PAM-like spray called Fritolim).

5. Bake for 20-30 minutes (it depends on your oven, I usually bake them for just 20 minutes because I like them quite moist). Check after 15 minutes just in case. Don´t open the oven before that because the mix would fall if air gets in while it´s rising.

*One thing I discovered over the years is that these brownies taste way better if you add around a teaspoon of cinnamon to the batter, I don´t know what it is about cinnamon that brings out the complexity of chocolate.

** When I do have chocolate at hand, I chop a little bit (around 4 ounces) and add it to the mix to make it thicker.

Friday, December 29, 2006

at long last... the panettone recipe

What a hectic week! Between Xmas, the puppies and catching up with work, it´s been hard to even think about writing an entry, typing the recipe and translating it.
But it´s about time I do it, otherwise, I´m gonna forget important details about the process and you´ll all end up with a crappy "pan dulce" lol
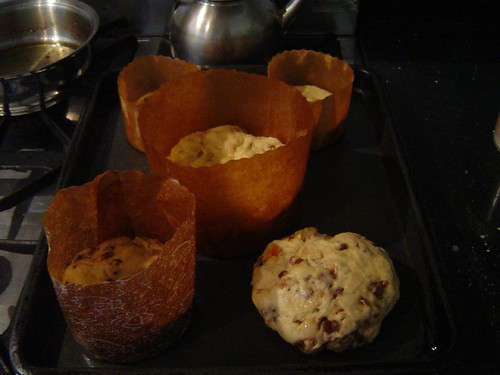
For those of you who missed the previous entries, I made a Xmas panettone with a twist on Saturday. The typical panettone (at least around here) has all types of nuts and crystallized fruits. There are two main types: the "pan dulce milanés" (panettone from Milan) and the "pan dulce genovés"(Panettone from Genova). The first is baked in a special paper mold and ends up with a mushroom-like shape, and the second one is baked without a mold and ends up with a loaf-like shape.
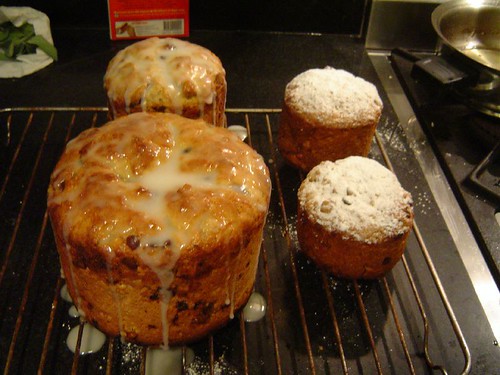
I went for the "milanés" shape:
panettone
Though here you see one of the Genova variety (right) because I ran out of molds lol
panettone

The personal twist comes in the filling. I have never ever liked store-bought crystallized fruits, they all taste the same, and it´s not a good taste anyway. I do like most nuts, but the problem with panettones which just have nuts is that it ends up being way too dry.
Another personal neurosis of mine is orange flower water, which is typical of our "pan dulce". I just can´t find myself enjoying that weird aftertaste.
So, in view of all this pickyness, I decided to make my own panettone suited to my taste... if not everyone else´s haha
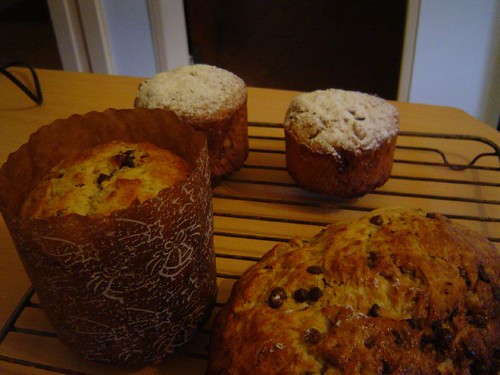
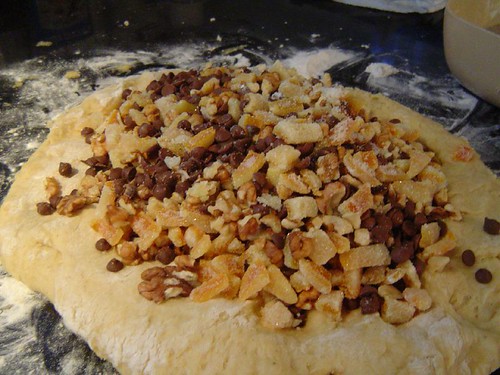
I used homemade orangettes, nuts and chocolate chips and I added a bit of cinammon to the dough. The end result was loooooooovely, moist and totally yummy. If you don´t trust me, check it out... or better yet, make it yourself, it´s easy, trust me.

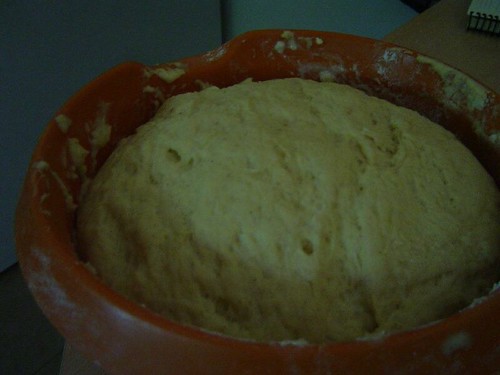
panettone dough

panettone

panettone

panettone

And, as you see, you get a big one, two medium ones and two little ones, so you get a lot for your work. I´m sure they would freeze well, but if you don´t wanna freeze them and you have some left over after 3 or 4 days...
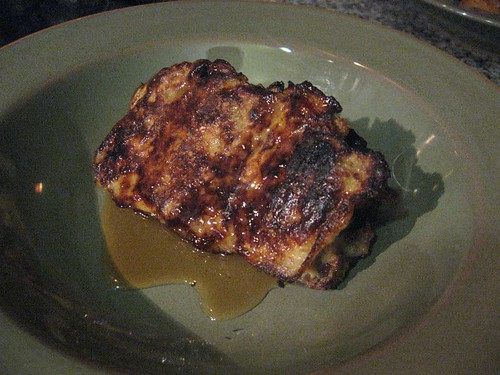
you can make a kind of French toast with it!!!! so very yummy, I just added some cinammon and vanilla, and 2 tablespoons of sugar to an egg-milk mix, soak slices of panettone in it, fry it with a bit of butter in a pan, and voilá. I poured a bit of maple syrup over it.
I can´t recommend it enough.
For visual evidence:

panettone French bread

Ok, after typing this loooooooooooong recipe in two languages, I think I deserve tons of comments hahahaha pretty please? ;)


Panettone (adapted from a recipe by Dolly Irigoyen)

Yeast proofing: fresh yeast (40 grams), sugar (1 T), milk at room temperature (1/2 cup), all purpose flour (1/2 cup).

1. Mix and let it rise covered till it duplicates its volume.

Dough: all purpose flour (600 grams, and 1 extra cup or so to work with the dough after letting it rise), softened butter (200 grams), salt (a pinch), sugar (150 grams), grated lemon and orange rind (to taste, around 4 teaspoons), eggs (5), cinammon (2 teaspoons), vanilla extract (2 teaspoons), malt extract (1 tablespoon, if you can´t get any, use honey).

1. Mix a little and then add the yeast proofing. Mix and knead to form a homogeneous dough.
The dough should be moist, but shouldn´t stick to your hands.

2. Let rise till it doubles its volume.

3. Flatten and incorporate the fruit, nuts and chocolate chips (the total amount can´t be over 600 grams overall). I used 300 grams of chocolate chips, 200 grams of orangettes and 100 grams of nuts.

4. Form balls and place them in buttered panettone molds (it yields 1 large, 2 medium and 2 small). If you don´t have the molds, do them without them.

5. Let them rise till they duplicate their size.

6. Brush with melted butter and then with egg. Cut a cross on top with a razor or a good knife.

7. Bake at 180C (350F) for 60-70 mins for the big one, around 45 for the medium ones and 25-30 for the small ones.

8. Sprinkle with powdered sugar when it is still hot or pour glase over it (I used a lemon-powdered sugar glase).


Pan dulce (receta adaptada a partir de la dada por Dolly Irigoyen en www.elgourmet.com)

Esponja: 40 gramos de levadura fresca, 1 cda de azúcar, 1/2 taza de leche a temperatura ambiente, 1/2 taza de harina común.

Mezclar, tapar y dejar duplicar.

Masa: harina común (600 gramos), manteca pomada (200g), 1 pizca de sal, azúcar (150g), ralladura de naranja y limón, huevos (5), canela (2 cditas, también se puede usar agua de azahar si se quiere), escencia de vainilla, extracto de malta (1cda., reemplazar por miel si no se consigue).

1. Mezclar un poco y después agregar la esponja.

2. Mezclar o amasar hasta formar una masa homogénea y húmeda, pero que no se pegue a las manos.

3. Dejar levar hasta que duplique su volumen.

4. Desgasificar e incorporar frutas (esta cantidad de masa aguanta un máximo de 600 gramos de relleno). Yo usé naranjitas confitadas (200 g), chips de chocolate (300 g) y nueces (100g).

5. Armar bollitos y ponerlos en moldes de pan dulce enmantecados (rinde 1 grande, 2 medianos y 2 chicos).

6. Dejar levar hasta duplicar.

7. Pincelar con manteca derretida y después con huevo. Hacer corte en cruz con gillete o cuchillo bien filoso.

8. Hornear a 180C (350F) (alrededor de 60-70 minutos el grande, 45 minutos los medianos y 25-30 minutos los chicos).

9. Espolvorear con azúcar impalpable en caliente o bañar con glasé (yo usé glasé de jugo de limón y azúcar impalpable) o fondant.

Saturday, December 23, 2006

new traditions

I finally got around to making the panettone today. I´ll post all of the details probably tomorrow during the day, but I wanted to leave you with pictures of the magic process it entailed.
Lovely stuff, if I had known it was pretty easy to make it, I would have given it a try way sooner!!!

panettone

panettone

Wednesday, December 20, 2006

panettone prepwork, orangettes

At long last, I´ve surrendered to the Xmas frenzy hahaha and all I have to say is, oh my, I´m soooooo tired.
Trying to plan ahead, I decided to make orangettes for the panettone I´ll be making on Saturday, which hopefully will turn out as scrumptious as I dream it will.
They looked simple enough... don´t most recipes? but then again, many of them end up requiring quite a bit of toiling.
BUT, and this is a big but, their taste and texture completely make up for it. They are sweet, a bit crunchy, and the flavor is nearly orgasmic, both with or without chocolate (though I think the chocolate just takes it to the next level).
I adapted the recipe to suit my needs, since I just wanted to do just a few of them covered in chocolate and I didn´t like to roll them in cocoa afterwards. For the ones without chocolate, I decided to roll them in sugar while they were still hot (be careful with your hands... don´t ask why I feel the need to make this warning hahaha).
If you often find orange too bitter, don´t worry because the bitterness disappears after boiling them twice. And the concentrated flavor achieved in the end is absolutely delicious.
If you don´t feel in heaven eating these babies with a nice mocaccino or a quality tea, then I don´t know what kind of person you are and I don´t wanna know you at all. Do you have a soul??? hahahahaa

In case I don´t post earlier, I wish you all a very Merry Xmas and I hope you have a wonderful time with your loved ones, without any quarrels or anything like that :)

Without further ado, here they are in all their yumminess.
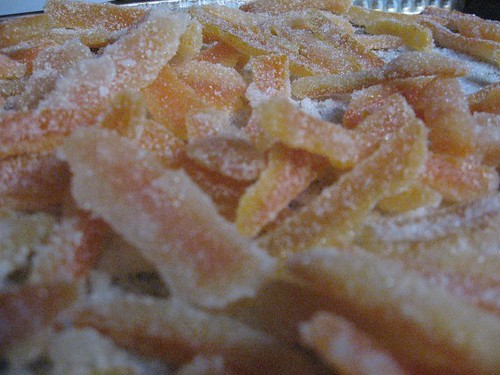
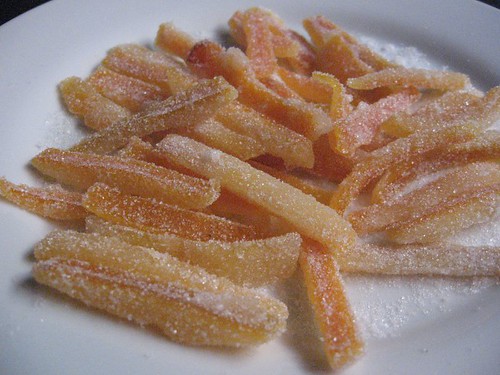
orangettes
orangettes
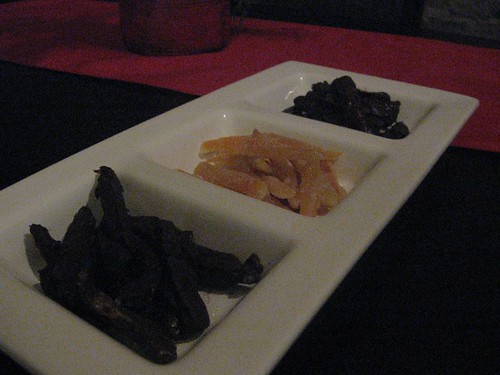
candy assortment

Orangettes (adapted from here)

4 large oranges
8 ounces water
8 ounces sugar
16 ounces dark chocolate
granulated sugar

1. Slice the ends off of the oranges, score the peel from one end to the other, and remove the peels off the oranges.
2. Slice the peels into thin strips and trim the edges.
3. Using a medium size pot, place the peels in boiling water and blanch them for a few minutes. Rinse the peels, and repeat this process a second time. This is done to remove the bitterness of the peels.
4. Prepare the simple syrup by combining the water and sugar in a sauce pot. Bring the syrup to a simmer, place the peels in the pot, and simmer for 1 hour. Once the peels have cooked, remove them from the pot, and place on a rack to cool and drain.
5.
For the chocolate orangettes:
Melt the dark chocolate over a double boiler. Dip the candied orange peels in the chocolate, remove them quickly, and place them on a rack to cool and drain.
For the regular orangettes:
After removing the peels from the pot, roll them in granulated sugar while they are still warm and let them drain.
6. Store the orange peels in an airtight container.

NOTE: I´ve just realized I had used the very same title Deb had used for her post on orangettes. I guess the title got inside my head while I was using her instructions to make them and then I thought "candy girl, that could work, like that old Acqua song called "barbie girl". Anyone remember one-hit-wonder Acqua? hahahaha anyway, I digress, I just wanted to clarify the whole title plagiarism haha

Friday, December 15, 2006

utter cake goodness

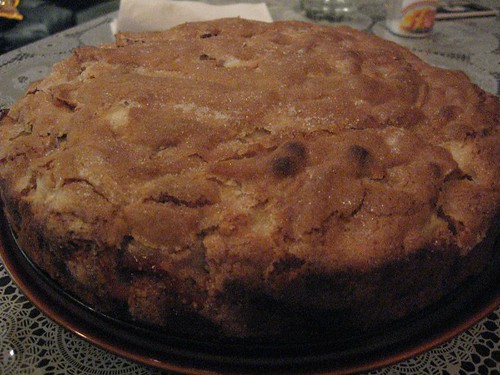
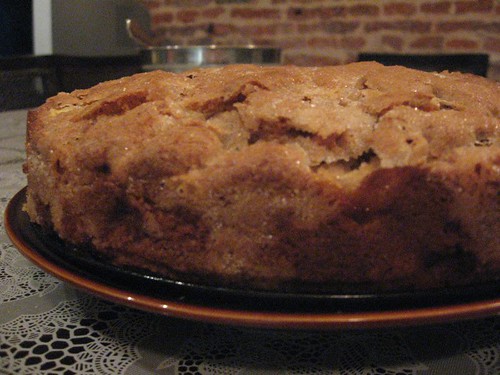
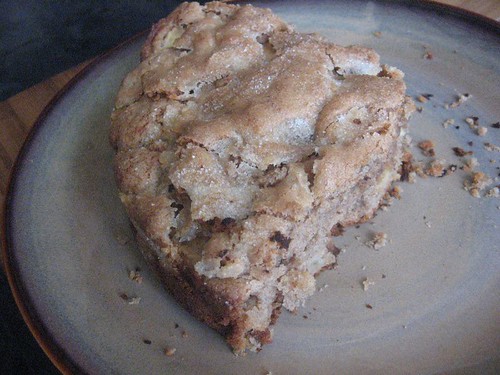
apple cake

Well, in a calmer mood, I´m willing to fulfill my promise and tell you all about this apple cake I mentioned before.
As you all know, apples and cinammon are one of those matches made in heaven, they simply bring out the best in one another.
There´s something utterly comforting in a good slice of apple pie, along with a good tea or a nice cup of capuccino. And if said cake is easy to make, everything tastes so much better because you aren´t tired from all the toiling in the kitchen.
This cake is definitely on the easy side. I´m not sure who invented it because it has been in my recipe notebook for years now. I´ve made it quite a few times and it has never failed me... in fact, I don´t think it CAN fail anyone.
So I know it´s not a cookie or anything too Christmas oriented, but I recommend anyway, either for Xmas or afterwards when you want to make something great without much slaving yourself in the kitchen.

apple cake

apple cake

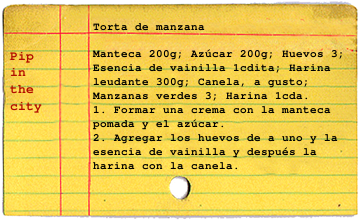
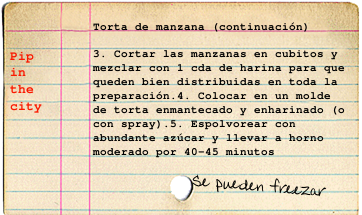
Here is the original recipe in Spanish, followed by the translated recipe:

torta de manzana
torta de manzana_cont

Apple cake

Butter 7 oz
Regular granulated sugar 7 oz (if you have a sweet tooth, add around 1/4 of a cup more)
Eggs 3
Vanilla extract 1 teaspoon
Self rising flour 10 and 1/2 oz
Cinnamon, to taste
Green apples 3
Flour, 1 tablespoon

1. Cream the softened butter with the sugar. Add the vanilla extract.
2. Add the eggs one by one.
3. Add the flour and the cinnamon.
4. Chop the apples in little cubes and mix them with the tablespoon of flour to achieve an even distribution and mix them in with the batter.
5. Pour in a cake pan, previously buttered and floured (or sprayed with PAM).
6. Sprinkle heavily with sugar.
7. Bake in 350F oven for 40-45 minutes.

You can freeze it perfectly well (I freeze individual slices).

Thursday, November 30, 2006

the sweet life

As you know if you have been reading this for a while (I wouldn´t know, since no one cares to comment :P ), I´m trying to stay away from my much-loved baked goods. It´s working pretty well because it allows me to discover new things in the savory and light department, but sometimes it is hard, like when I read food blogs and see these amazing photos of cakes, cookies, et al.
This time, the culprit was Deb from Smitten Kitchen. She published a wonderful cake made famous by her mom and gave it such high praise that I felt compelled to try it myself. Yes, I know it´s cheap to blame it on her, but oh well, whatever it takes to clean my guilty oh so guilty concience lol

Here is the recipe (originally published here) followed by my comments, changes and photos.

Chocolate Chip Sour Cream Cake

1 stick butter, at room temperature
1½ cups sugar
3 eggs, separated
1½ teaspoons vanilla extract
16 ounces plain yogurt or sour cream
3 cups all-purpose flour
1 teaspoon baking powder
1½ teaspoons baking soda

12 ounces chocolate chips
½ cup sugar
1 teaspoon cinnamon


1. Preheat oven to 350 degrees F (180 C)

2. In a large bowl, cream butter and 1½ cups sugar, then mix in the egg yolks and vanilla. Sift flour, baking soda and baking powder together into a separate bowl. Alternately add sour cream and then dry ingredients into butter mixture. Beat eggs whites until stiff, then fold into batter. Mix last ½ cup sugar and cinnamon together in a separate, small dish.

3. In a greased 9″x13″ pan, pour in half of the cake batter. Sprinkle the top with half of the cinnamon-sugar mixture and half of the chocolate chips. Pour remaining batter on top, sprinkling the top with the remaining cinnamon-sugar and chocolate chips.

4. Bake for 40 to 50 minutes, or until a tester comes out clean.


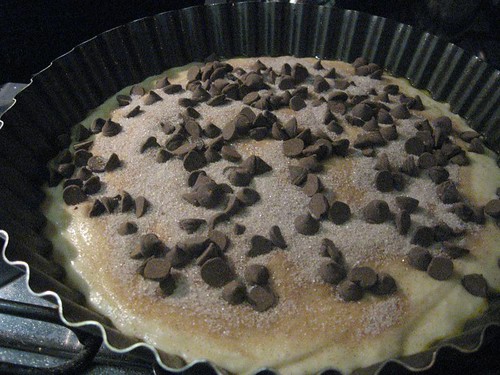
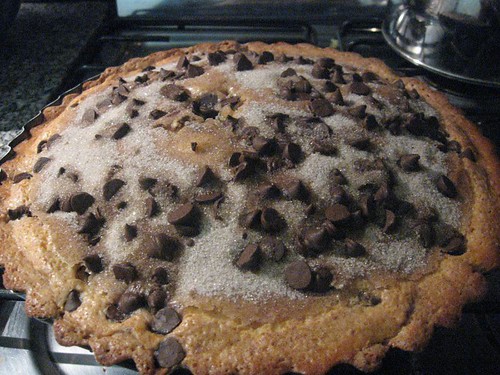
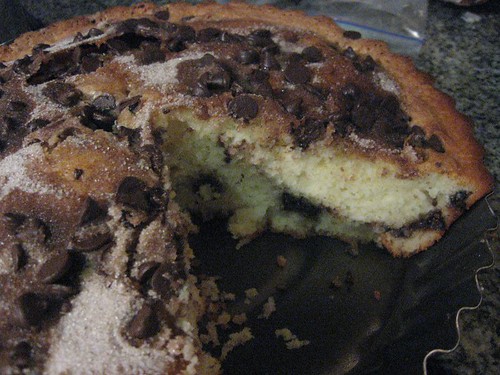
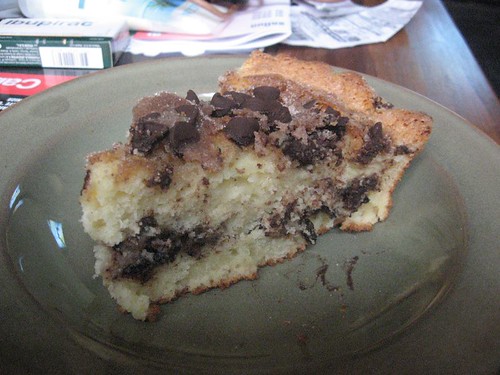
The cake is nothing short of amazing, perfect flavor, very moist, just lovely. I made it with plain yogurt instead of sour cream because we don´t use sour cream in Argentina. I also added a bit of orange zest to the cake mix simply because orange+cinamon+chocolate is just heaven on earth (next time I´ll add some more for it to have more of a presence).

Since I still had like a quarter of it left over even after some friends had helped me dispose of it (I mean, with friends like that, the world would be such a better place, such generosity and sacrifice!!!), I just froze the rest of it. When another lucky friend came over on Tuesday, I defrosted a piece with a minute in the microwave and then another minute in a non-stick pan, and it was amazing. So freeze away (that is, if you have any leftovers to begin with).

Here it is in all its glory. I hope you enjoy this little detour in all things healthy and light ;)

chocolate chip and yogurt cake, unbaked

chocolate chip and yogurt cake

chocolate chip and yogurt cake

chocolate chip and yogurt cake