Showing posts with label savory. Show all posts

Wednesday, February 21, 2007

gruyere-serrano ham focaccia

I´ve only ventured into bread-making quite recently and I can´t believe it took me so long to jump in. I mean, there must be something inherently scary about yeast, you know, all the fears about "killing it", no wonder people are scared of bread if they choose those words to describe the process!
First, I tried my hand at pizza, then I did a white batter bread which turned out beautifully, and was so happy with it I did repeats for different people quite a few times... oh, the bread-maker´s ego.
I even jumped in the no knead bread bandwagon.
There was only one way to feed my new addiction: buy a bread-making book. Which I did a few weeks ago. I chose this book by an Argentine specialist I had seen on tv a few years ago and marvelled at the "foaminess" of his creations.
There are 145 recipes, so I will have plenty of stuff to keep me entertained, but the first recipe I chose was a gruyere cheese-serrano ham focaccia.
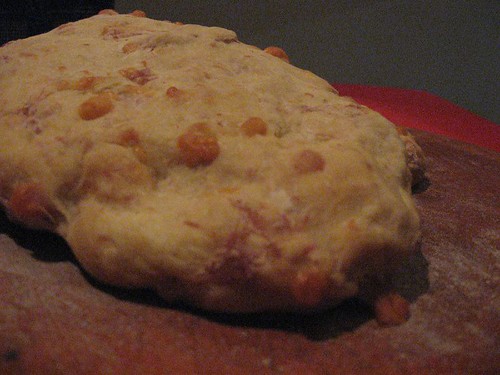
gruyere cheese-serrano ham focaccia

I usually know whether a recipe will succeed or not just by looking at the ingredients list. In this case: gruyere + ham = deliciousness.

Plus, the recipe was pretty easy and it yields 4 loaves, so I knew I probably would have 2 loaves left over from my dinner party that I would freeze and recycle for future dinners.
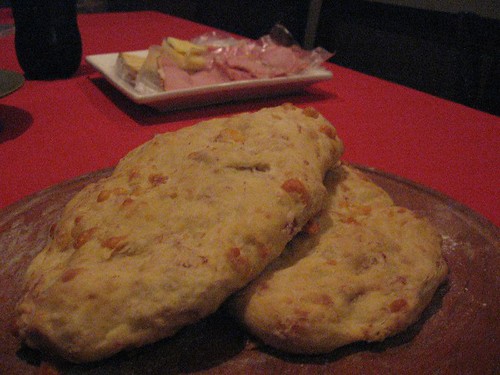
gruyere cheese-serrano ham focaccia

I wasn´t disappointed, the only slight problem was that the ham was a bit salty for my taste (then again, I´m used to eating with very little salt because my dad has high blood pressure so salt is pretty much non-existent at my parents´). So try your ham first and adjust the amount of salt you add to the dough accordingly.

You can also use the recipe as a base and exchange the ham for sun-dried tomatoes for instance. Just think of things you would like to find in there and you are set to go.
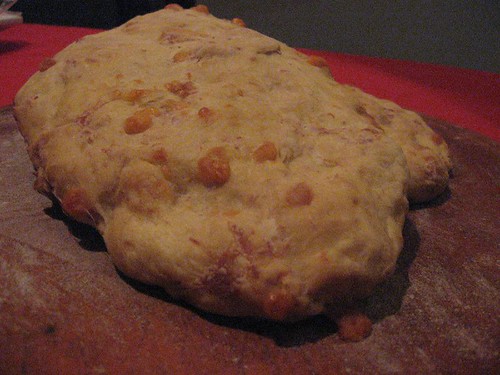
gruyere cheese-serrano ham focaccia

Gruyere-serrano ham focaccia (from 145 Recetas de panes y facturas by Marcelo Vallejo)

All-purpose flour (here it is called 0000), 500 grams (1.1 pounds)
Salt, 2 teaspoons
Fresh yeast, 25g (around 10g of instant yeast, 2 teaspoons)
Water, 300cc (around 10oz)
Egg, 1
Unsalted butter, 2 tablespoons
Serrano-style ham, 125g (around a 1/4 pound)
Gruyere cheese, 125g (around a 1/4 pound)
Extra-virgin olive oil (to brush the bread)


Yield: 4 loaves

1. Place the flour and the salt in a bowl. Make a hole in the middle and put the yeast, the lukewarm water, the egg and the softened butter there. Mix slightly.
2. Chop the ham slices thinly and the cheese into tiny squares. Add to the dough.
3. Knead until you get a soft, homogeneous dough (about 3-5 minutes).
4. Put back in the bowl and cover with plastic wrap. Let it rest for 30 minutes.
5. Divide the dough into 4 rolls. Cover and let the balls rest for 15 minutes.
6. Pull out each ball with your hand, giving it an oval or rectangular shape. They should be about 1cm thick.
7. Place them on oiled pans. Brush the top of each loaf with extra virgin olive oil. Cover and let them double.
8. Preheat the oven to 180°C (350°F).
9. Bake for 30 minutes. Serve warm.
Saturday, February 17, 2007

lazy ravioli

I´ve really come to love Asian food in the last few years, but Italian will probably always be what I eat when I want comfort food. So last week I made ravioli marrying the two cuisines in a way... no, I have come to hate the whole "fusion cuisine" movement because it is way too snobish, so I won´t categorize my recipe under fusion cuisine.
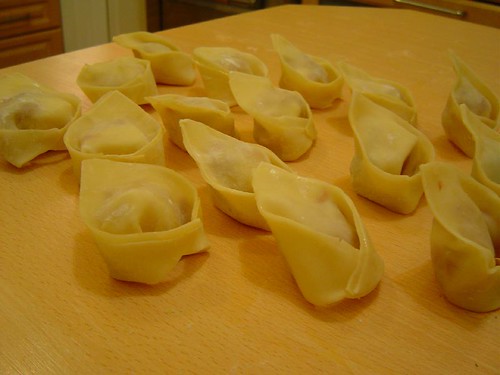
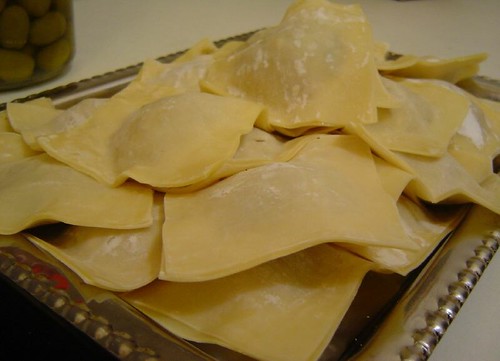
Basically, I was too tired to make the ravioli dough from scratch, so I grabbed a pack of won ton wrappers I had in the freezer and made some huge ravioli with a shitake-panko-potato flakes-onions-parmessan filling with a mozzarella cube in the center, served with a very simple tomato sauce.

raw won-ton ravioli

They turned out great. I managed to avoid extra moisture in the filling by adding panko, parmessan and potato flakes (the stuff you use to make instant mashed potatoes). I used some dried red mushrooms and shitake mushrooms and soaked them in hot water for a minute (you could use white wine or anything else you want to add another layer of flavor).

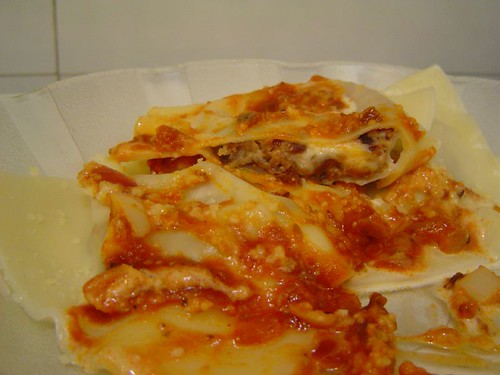
won-ton ravioli with mushroom-cheese filling

I cut some small cheese squares and wrapped the filling around them before placing them in the dough... so the ravioli would end up having a lovely melted cheese center, I mean, the equation could not go wrong, mushrooms, parmessan, onions, mozzarella, a hint of Tabasco sauce, served with tomato sauce, a bit of fresh cream, a drizzle of olive oil and parmessan flakes, what´s not to love?

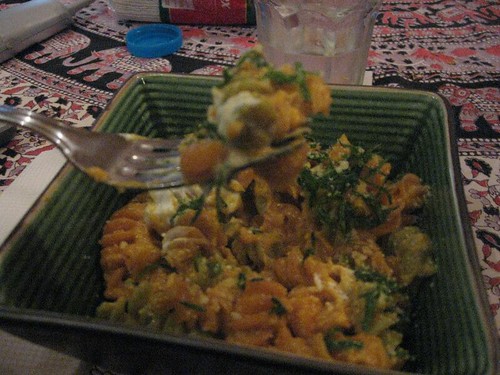
Oh, and another recipe suggestion. We run out of mushroom filling (we had enough wrappers to make 50 ravioli), so for the second batch we simply used some mozzarella and some salami for some, and mozzarella and green olives for the rest. My mom gave them a fancier shape, which probably has a name in Italian but I have no idea what it is, anyone knows what these would be called?

won ton ravioli with salami-cheese filling

They are also easy to make. Use 1 won ton wrapper instead of 2, put the filling in the center, paint with egg, fold it to get a triangle and join the two side tips.

I´ll attempt to give you a recipe, which will read more like guidelines than anything because I wasn´t really measuring anything. The main point though is for you to try your hand at ravioli even if you feel lazy or don´t have a pasta roller. Using this method, we made 40 ravioli in an hour, and none of them opened at all while boiling!!! now, that´s a first.

won-ton ravioli with mushroom-cheese filling

Won ton ravioli

50 won ton wrappers
around 2 cups dried mushrooms (I used shitake and red mushrooms)
1 medium red onion
1/2 cup panko
1/2 cup parmessan
1/2 cup potato flakes
a dash of Tabasco sauce
around 1 tablespoon of pesto
salt

1 egg (as a glue to seal the ravioli)

1. Chop the onion finely in the food processor and saute it with a bit of butter for a few minutes just to tone down the flavor a little bit. Put them back in the food processor.
2. Soak the mushrooms in water for 1 minute. Rinse and blend them in the food processor along with the cooked onion.
3. Place the mix in a bowl, add Tabasco sauce, the pesto and the salt.
4. Then start adding alternately panko, grated parmessan cheese and potato flakes until you get a firm mix which will be easy to work with your hands. Let it rest in the fridge while you lay out the won ton wrappers.
5. Cut some small mozzarella squares.
6. Place the won ton wrappers on the counter. Wrap the cheese squares with the mushroom filling and put the little ball you formed in the center of the wrappers.
7. Paint the borders with a whisked egg. Cover it with another wrapper making sure the borders are hermetically glued together and you have eliminated as much of the air that forms inside the ravioli as possible.
8. Boil it gently in salted water for around 3-4 minutes (do check though).
9. Serve the ravioli with a nice tomato sauce, a bit of fresh cream, a drizzle of good olive oil and some parmessan flakes. Enjoy!

STRANGE TRIVIA I noticed looking at Google Analytics that I have 1 reader from Carbonera!!! You say, what is Carbonera, well, Carbonera is a small town in Treviso, Italy where my dad´s family comes from. I mean, it is really small, so I almost fell from my chair when I saw "Carbonera" in the statistics. I was there once and I love the place... for what it is, for the family I have there and for all the place means, so if you are that reader from Carbonera, leave a comment or email me, I´d love to hear from you! (by the way, that extends to every single reader of this blog, I don´t discriminate against non-Carbonera people haha).
Saturday, February 03, 2007

Argentina 101: pizza and fainá

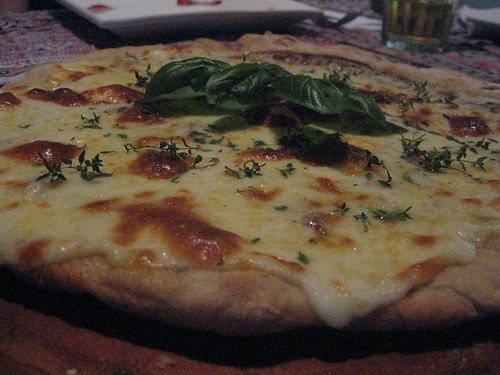
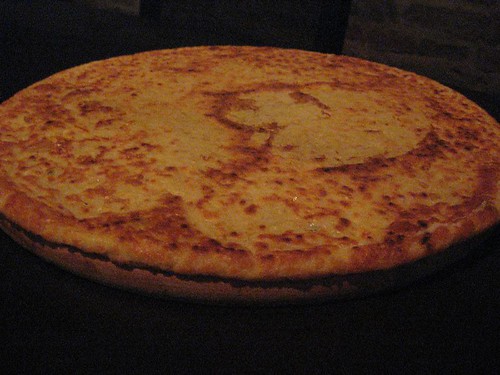
marguerita

As with any country with such a strong culture of immigration, Argentina´s food is a mixture of different cuisines... though the one that clearly wins the race is Italian food, followed by Spanish food.
I know that for all of you, pizza is as common as burgers, but I also know that most of you probably never heard of something called "fainá" in Argentina (from the Genovese dialect) and "farinata" in the rest of Italy.
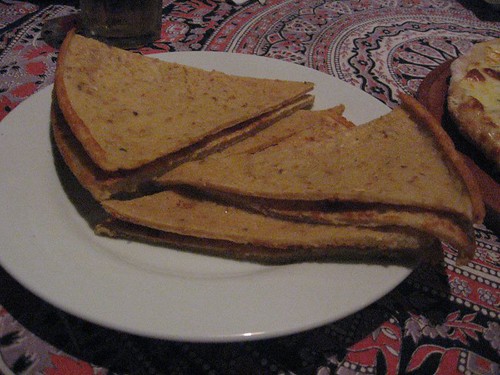
It´s like a "secondary pizza" used to go with the regular pizza which is made of chickpea flour and seasoned with pepper, sometimes dried onions, a bit of parmessan, etc.

faina

It´s moist inside and crunchy outside and makes for a great complement to pizza. It can even be topped with pretty much anything and used as a pizza base (I have had it with dried tomatoes, garlic and some parmessan flakes and it is wonderful).

Since I cheated and bought a premixed base of garbanzo/chickpea flour and dried onions, I can´t abide by the recipe I´m about to give you, but it does come from an Italian site, so it should be good, right? ;)

marguerita

This is what made me turn on the oven when it was 95°F/35°C outside, so if that doesn´t show this is a winning combination, I don´t know what will.

Besides, millions of Italians can go wrong when it comes to choosing a president, but not when it comes to food!!! lol

faina

Fainá or Farinata (adapted from here)[See another interesting recipe at Recipe Zaar]

Ingredients:
• 3 3/4 cups water
• 2 1/3 cups Italian chick pea flour
• 1 teaspoon salt
• rosemary (optional)
• 5 tablespoons extra virgin olive oil
• ground pepper
• parmessan cheese (4 tablespoons)
• onion powder (around 2 tablespoons)

Preparation:
1. Mix the water and the flour with a wooden spoon or a whisk; make sure there are no lumps, add salt to taste, and mix again.
2. Add the rosemary, the parmessan cheese and the onion powder and let it sit for a while (one to three hours or even better overnight).
3. At this point add the olive oil. Remove the rosemary and pour in a baking pan.
It should be about an eighth of an inch thick, perhaps a little more. Put it in a preheated oven at 190-200° C (375-400° F). [I have found some recipes that say you should put the pan in your pizza stone or the hottest part of your oven for 15 minutes and then put it in a colder spot, usually the middle or the top, for 20 minutes more].
4. Remove from the oven when one of the corners (or the edge) starts to appear dark. Sprinkle plenty of pepper and serve.
It is of paramount importance that the pan is perfectly flat and level when in the oven, otherwise one of the corners will be thicker and will be undercooked when the opposite corner starts to darken.

Thursday, February 01, 2007

la verdad de la milanesa

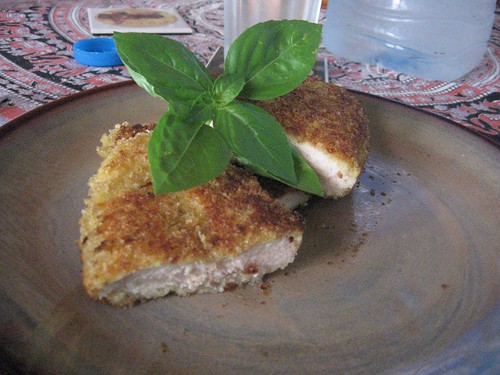
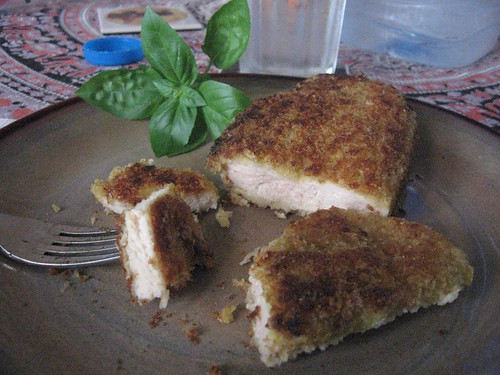
breaded chicken or milanesa de pollo with panko and dried potato flakes

Ever since I´ve started blogging, I noticed I was more aware of the food I was cooking and wanted to try new things all the time. Somehow, the stuff I considered normal or everyday food didn´t cut it, it had to be something quite new and, if possible, adventurous.
Thing is, even though I love that aspect of blogging because it even made me revisit beets (more on that later), I still find much joy in what to me is comfort food at its best.
It´s those timeless classics that taste of childhood and just feel right every single time.
In Argentina, what we call "milanesa" would be at the top of the list of classics. Basically, it´s breaded meat, be it veal, the classic, vegetables or chicken.
La "milanesa a la napolitana" is THE classic, especially with French fries as a side dish.
Milanesas are sold in sandwhiches at our typical "kioskos", which is like a candy store-grocery store type of place found at pretty much every single street in Buenos Aires.
Yesterday, I was yet again struggling to meet a deadline at work and my stress level was quite high (for me at least, I´m usually quite calm about life and all that comes along with it, but sometimes it does get on my nerves). I recalled I had a nice piece of chicken in the fridge and that I had been meaning to repeat a bit of an invention I had done with the typical milanesa a few weeks ago.
Instead of using the typical breadcrumbs, I used my newly-discovered and much-loved panko and dried potato flakes (the stuff you use to make instant mashed potatoes). I got the idea of using the potato flakes from the Surreal Gourmet, but I figured using panko as well would be an interesting mix. Besides, here in Argentina, panko is only found at Asian markets and quite expensive, so mixing it up with the potato flakes also made sense for a stingy girl like myself lol
Ok,so, back to the "recipe", for the egg mix, I went along the Asian route again and added ground ginger, curry, red pepper flakes and rosemary (ok, that last bit was Italian... well, you know, I´m doing "fusion cooking" hahaha). I added a bit of milk to the eggs as usual (though some people advice using a bit of soda water as well, and I have to say, that also gives a nice crust). I did the egg mix-crumbs step twice to end up with a nice thick crust.
What is lovely about this crust, besides the crunchiness, is that it helps keep the moisture in the meat, so you get a terrific contrast of textures. I cooked my milanesas in a skillet with a bit of the curry-ginger oil I did a while back.
So there you have it, more of a tip or an idea than a recipe this time, but trust me on this one and try it out, your stomach will thank you!

breaded chicken or milanesa de pollo with panko and dried potato flakes

Monday, January 29, 2007

a bit of chai... and quite a bit of playing by ear

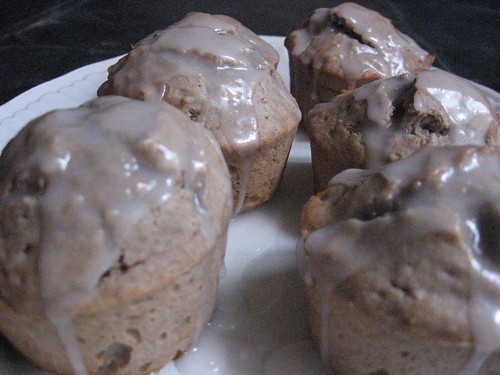
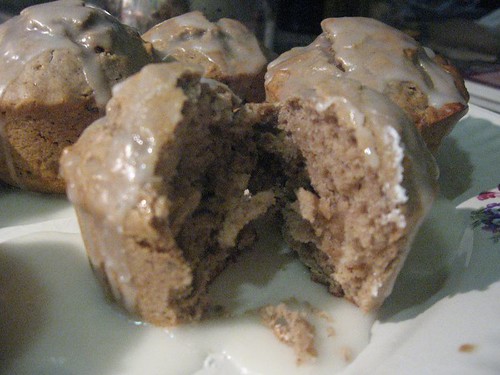
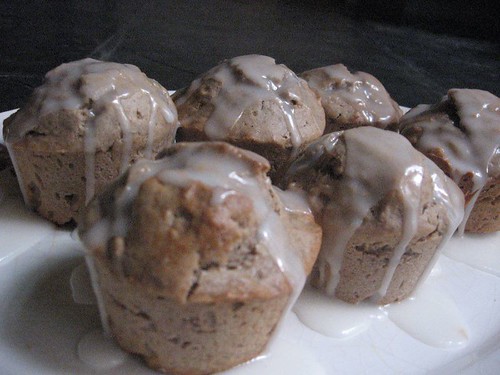
chai muffins with lemon glaze

Last week, in the midst of the work kaos I´m currently drowning in, I decided to play it cool and spend the whole afternoon experimenting in the kitchen. One of the best ways to release stress for me is cook exactly what I´m craving (I did say "one").
And, as it happens quite often, relaxation equals something sweet, and something having to do with chai tea.
I fell in love with chai in my second visit to the US, at Borders to be more precise. I bought a travel coffee mug and they gave me a free drink with the purchase. I had seen frozen chai latte there before, it was summer and I was stuffed after eating at the Olive Garden (I know, I know, it´s probably not the best restaurant on earth or anything, but I was in Tulsa, so my selection wasn´t endless, and I was pretty homesick after a month there, so Italian food = home). Anyway, they didn´t have the frozen chai, but they did have chai, so I went for it. I´ve never looked back, I was hooked instantly: the perfect balance of sweet and spicy, and all the fragrances. I started drinking it like there was no tomorrow, yet there was a tomorrow, and the tomorrow was here in Argentina... which is truly great in many ways... but it was chai-less... and the mere thought of a chai-less existence was hard to bear.
Over-dramatic? That description? Come on!
But anyways, who saved me from utter chai-withdrawal was my "friend" Narda Lepes again. For some reason, she decided to do a homemade chai recipe on her show, and I was instantly hooked. Some cloves, cardamom, fresh ginger, cinammon sticks and black tea and I was good to go. Later on, I was able to get this chai here

my beloved chai

... but the flavors aren´t as strong as that first Borders chai who first enamoured me or the homemade chai I sometimes indulge in.
But last week, I wasn´t going to settle for chai as is, no, no, I needed chai in a different package... and that package ended up being cute little muffins with a lemon glace.
I altered a simple muffin recipe so that I could end up simmering cream with all the chai spices and voilá, chai muffins.

chai muffins

The result was fantastic, but I don´t think it makes sense to share my somewhat complicated "recipe", because you guys have chai syrups readily available, so you can just take a simple vainilla muffin recipe, add a bit of syrup, and you have amazing chai muffins. Those of us living at the world´s rear end have to make do without Amazon and without chai syrup... but we´ll persevere, despite this uphill struggle hahahhaa I think all this work is catching up with my brain and my sense of drama.

chai muffins with lemon glaze

And a few other photos before I go to bed to get my well-deserved rest. This is another one of the "creations" that came out of my tired little brain that day.

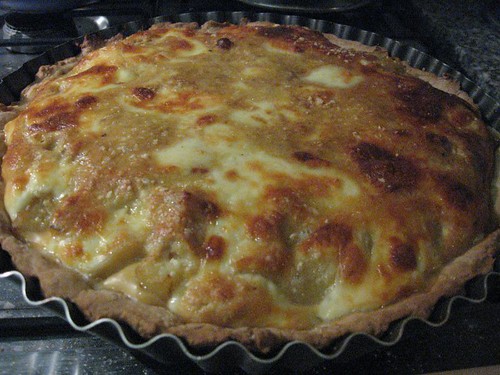
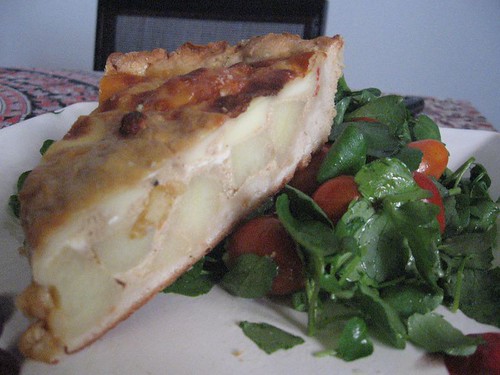
It´s a potato-onion soup-cheese quiche I created to reinvent a French onion soup that was way too strong to eat as such:

onion soup-potato quiche

Just what people in low-carb diets need!!!

onion soup-potato quiche

Good night everyone :)

Thursday, January 18, 2007

A twist on gnocchi... or How to avoid being compared to your Italian grandma

gnocci-roller

One of the biggest traditions in my family is Sunday lunch at my grandma´s. My nonna, true to her Italian origin, always makes us some sort of pasta (with the exceptional rabbit dish, but no other deviations from the rule). She makes a killer lasagna, exceptional taggliatele, lovely canelloni... but the dish she is best known for is her potato gnocchi.
All of my closest friends have come to a Sunday lunch at some point to try a plate of Vanda´s famous gnocchi, and none has ever left disappointed... or hungry. Because my grandma is very Italian in that respect as well, her biggest concern is always that someone will end up hungry, she just wouldn´t be able to tolerate that. I mean, it is a very Italian frame of mind, but at least in her case, it also has to do with the hardships she suffered back in Italy, WWII and all.
She shouldn´t have anything to worry about because everyone ends up both well-fed and totally satisfied after a great meal every single time.
But her gnocchi fame can be overwhelming for the rest of us mortals. My mom never makes gnocchi, how could she bear to be measured up to my grandma´s legendary gnocchi-making abilities? And I certainly don´t blame her. Even though my grandma has always shared the secrets of gnocchi-making with us, it´s just hard to just go for it with such a legacy.
That´s why I hadn´t tried my hand at gnocchi before. But lately I´ve been thinking it was time. Besides, I got a brilliant idea: I would invite some friends over, friends who hadn´t tasted my grandma´s gnocchi, that way, they would love them whatever the results (I know, my intelligence is out of this world, ha!).
What also spurred me was another recipe by my beloved Narda Lepes. You see, hers were no regular potato gnocchi, but yam gnocchi with sage, which promised a whole new spectrum of taste experiences.

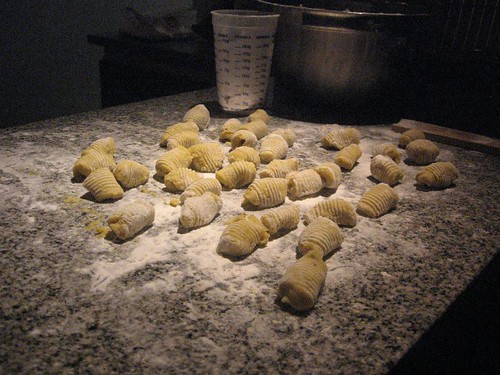
raw gnocci

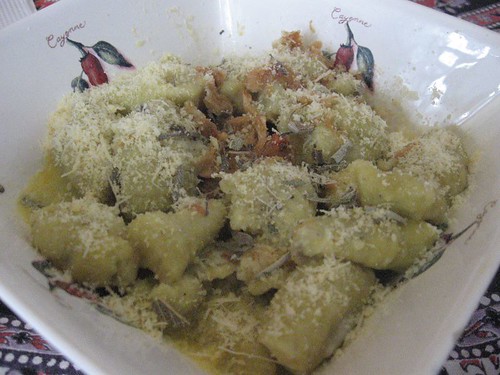
I cannot begin to tell you how easy it was to make them and how lovely they turned out. The flavor of the yams is complemented exquisitely by the sage and the butter (and the parmessan of course). What I did add to the recipe was some echallotes (I had some dried ones I bought at ChinaTown) and some parmessan in the dough itself.
I might have overdone the not-too-much flour principle because they were a bit too soft to handle comfortably, but I cooked the second batch a little less and it was perfect (I didn´t use the full amount specified in the recipe, so I think using the full amount would be perfect).

gnocci

I´m certainly no expert on the matter, but here are some things I did that worked and might work as tips:
*Steam the potatoes/yams instead of boiling them, that way, they don´t have as much humidity and absorb less water.
*Mash the potatoes/yams as soon as you finish steaming them (I used an immersion blender)
*Incorporate the rest of the ingredients when the yams are still quite hot (that´s something my grandma does and it seems to work really well).
*Do not skip the rolling into gnocci-like shape step because it is precisely that shape which allows you to cook the gnocchi properly (otherwise, it´s very hard to cook the center).

Yams-sage gnocchi (adapted from a recipe by Narda Lepes)

yams (750 grams/1.6 pounds)
butter (30 grams/1 ounce)
egg yolk (1)
salt and pepper
all-purpose flour (225 grams/1/2 a pound)
grated parmessan cheese (1/2 a cup)
sauteed onions (1). I used a bit dried echalottes, dried onions could work as well.

For the sauce:
butter (around 30 grams/3 tablespoons, it really depends on what you want)
grated parmessan cheese (1/2 a cup)
fresh sage leaves (20 leaves), if you use dried sage leaves, you might need quite a bit more.
garlic (1 clove)

1. Peel and chop the yams into medium-size squares.
2. Steam them until they are tender and mash them right away, making sure they are no lumps.
3. Add the butter to the hot puree, then salt and pepper. Incorporate the yolk whisking fast so you don´t end up with scrambled eggs. Add the grated parmessan and the onion, dried echallotes or any other flavor you like at this point.
4. Mix well to incorporate all the ingredients. Then incorporate the flour slowly until you get a tender dough. Let the dough rest for a while. Do not overdo the kneading because you don´t want the gluten to develop.
5. Separate the dough in smaller balls and roll them into cylinders. Cut the gnocci in the desired size.
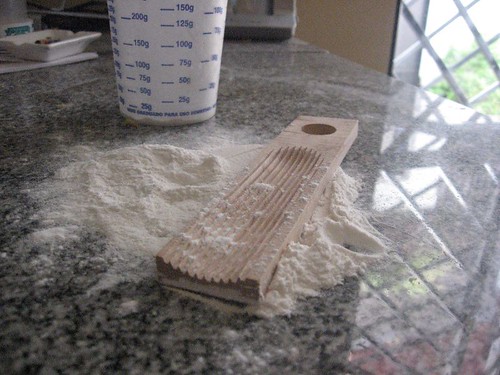
6. Shape the gnocchi by rolling them through a gnocchi-roller (or whatever you guys call it in English). You can also use a fork, but they don´t turn out as well.
7. Boil them in salted water until they rise to the surface.

For the sauce:
1. Melt the butter in a skillet, add the chopped garlic clove and the sage. Let everything cook for a while, but make sure the butter doesn´t burn. Tip: to prevent the butter from burning as easily, you can replace half the butter with olive oil, which will rise the burning temperature of the butter.
2. Add the gnocchi to the butter and mix everything for a little while (don´t let it there for over a minute or the gnocchi will start to break).
3. Serve it quickly with the grated parmessan sprinkled on top.

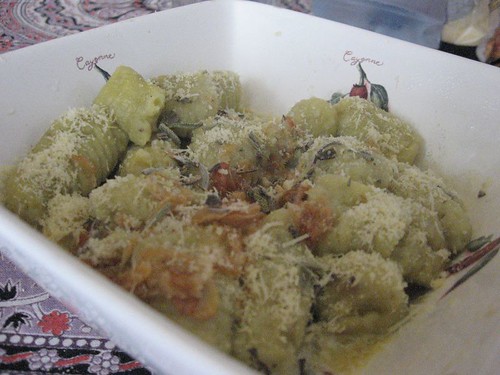
gnocci 2

This is my entry for Weekend herb blogging, hosted this week by Scott at The real epicurean.

Si alguien necesita la receta en español, escríbame a mi dirección de correo electrónico y yo se la mando.

Sunday, January 14, 2007

Weekend in the country

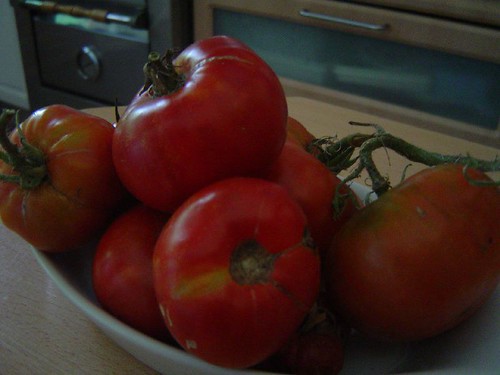
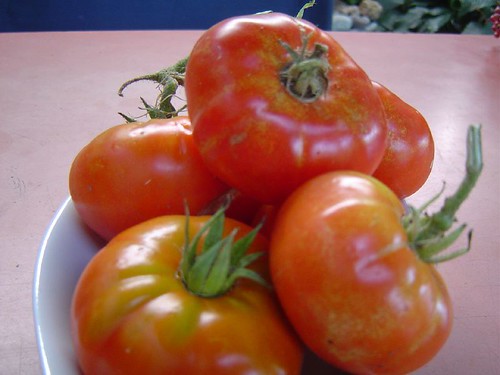
Well, not technically in the country, more like in the suburbs of Buenos Aires. But sometimes it does feel like being in the country, I mean, my parents are growing their own tomatoes now, my dad has been making wine for the last couple of years, they have their own herb section in the garden (that´s not as impressive though, because even I have a pot of herbs in my own tiny home). But the tomatoes have truly enamored me. They are so tiny and flawed. YES, flawed is good when it comes to vegetables, it means they are home-grown, pesticide-free and full of flavor, not blown up like most things we find at grocery stores.

Here they are in all their red glory...

home-grown tomatoes

home-grown tomatoes

Another impressive aspect of spending the weekend at my parents is the food. Basically I get to stuff my face with remarkable meals without having to cook. I sometimes cook, but I can eat as well, if not better, as if I was making the cooking without having to lift a finger.

My dad has always loved to cook, which was pretty unusual back in the day, and still is in Argentina, that retains much of its sexist "glory". I mean, most men take care of the "asados" (something similar to a barbecue), but that happens once a month or so. All the other meals in that month are the sole responsability of women... and many women don´t like to cook, so people tend to eat less-than-extraodinary meals.

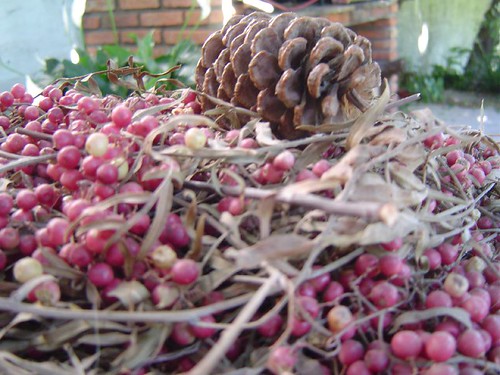
But going back to my dad, he has always cooked a few times a week (for dinner, of course, because he comes home for lunch for an hour, so the meal has to be ready by the time he arrives so he can have a 40-minute siesta). The meals he chooses usually have to do with seafood-fish, pasta or red meat, and they are never ever on the bland side of the flavor spectrum... sometimes they are even too flavorful or spicy. For instance, he has this love affair with sage which can get pretty overwhelming or pepper, he looooooves pepper, so much so that he collects them fresh whenever he sees a pepper tree. But he usually finds the right balance and makes terrific meals (though this is a secret between us, I don´t want him to get even less modest hahaha).

pepper

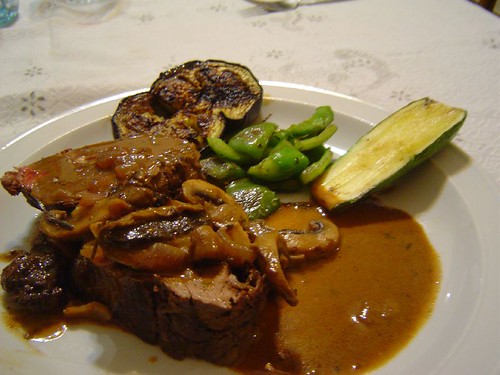
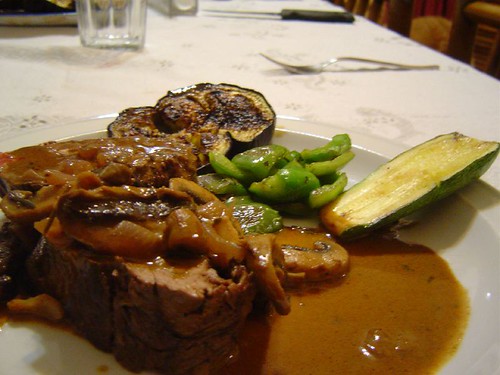
Last night, he went French on us and made sirloin stuffed with parmessan and prosciuto (ok, the stuffing is more Italian than French) with a mushrooms and cream sauce (this part is very French, ha!). (A clarification on the meat cut, our meat cuts are different than those of the US and Europe, but apparently our "lomo" is your "sirloin" or "fillet steak", basically, what you need is a very tender piece of meat without any bones). A combination like that cannot go wrong, and certainly didn´t this time around. The meat melted in your mouth and every bite of mushroom-cream infused goodness was fantastic. As a side, he made grilled vegetables-zuchinni, eggplants and green peppers- which lent a fresher touch to the meal and complemented the richness of the meal perfectly.

stuffed sirloin with mushrooms and cream

stuffed sirloin with mushrooms and cream

I´ll ask him all the details later to give you the recipe.

In the meantime, I´m off to enjoy these fluffy things:

posing

eyes wide open

This is them giving their first steps haha


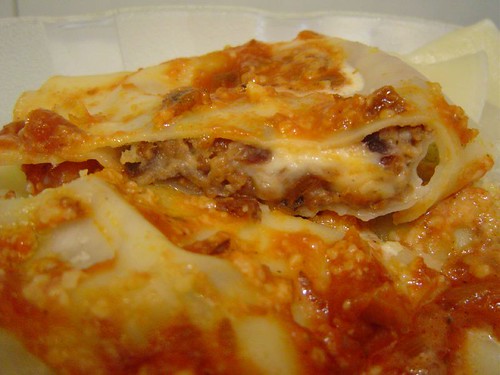
And then off to my grandma´s to enjoy a 100%-authentic Italian meal... which will look something like this:

my grandma´s lasagna

I know, I know, my life is hard.

Tuesday, January 09, 2007

what to do when you are really busy

My cooking inspiration can unleash itself at any given moment, but it is especially prone to awaken at the most incovenient of times... say, when I have an urgent project to deliver and I have no time to spend half the afternoon cooking.
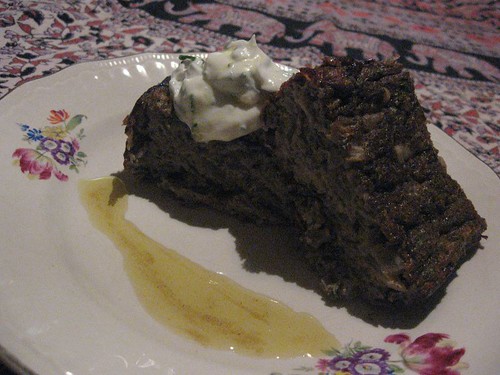
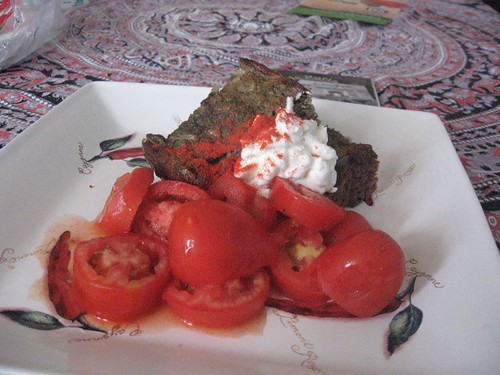
But, since apparently I have my priorities right, yesterday afternoon I decided it wasn´t such a bad idea to make an eggplant pudin with curry-ginger oil for dinner and the now world-famous World Peace Cookies for tea... I mean, why not? Work? Deadlines? What is that?
There was also a little problem called summer + oven, but that´s irrelevant at this point.
So I cut the eggplants in half, cut the inside into squares without cutting the skin (for clarification, see this), sprinkled them with thick cooking salt and let them rest for a few hours.
In the meantime, I set about preparing the World Peace cookies (but more on that on a future entry).
Earlier, I had prepared a curry-ginger oil by my newest favorite cook: Ming Tsei. Does that guy rock or what? The whole format of the show is totally logic: you start with a master recipe that you then use for different dishes, which reinforces an idea that some people have a problem understanding, that is, cooking is about fun, creativity and flexibility, following recipes blindly won´t make you a great cook, creating a great dish with the elements you have will.
Anyway, this oil is incredibly easy to make and you get a subtle, yet fragrant oil perfect for vegetables, meat or frying. I made less than the recipe called for because I don´t use oil that often to begin with, but you can basically twitch the recipe as you please. I used some of it replacing the normal vegetable oil the recipe called for.
Now on to the eggplant pudin. It is a recipe by another of my favorite cooks: Narda Lepes. Narda is a young Argentine cook with a very personal approach to cooking, you can check out some of her recipes and an interview by clicking on her name above (in Spanish).
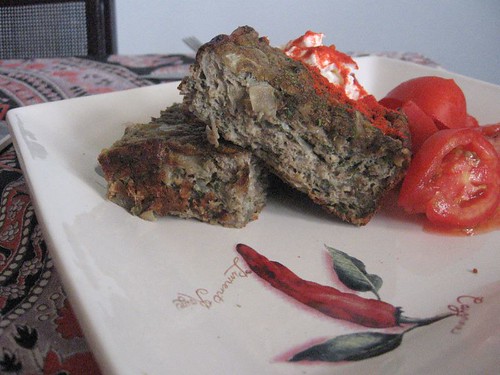
The outcome is full of flavor and perfect for eating cold with a yogurt sauce and a tomato salad in the summer (I know it´s winter for many of you, but you can eat it hot with mashed potatoes or something or save the recipe for the winter ;)
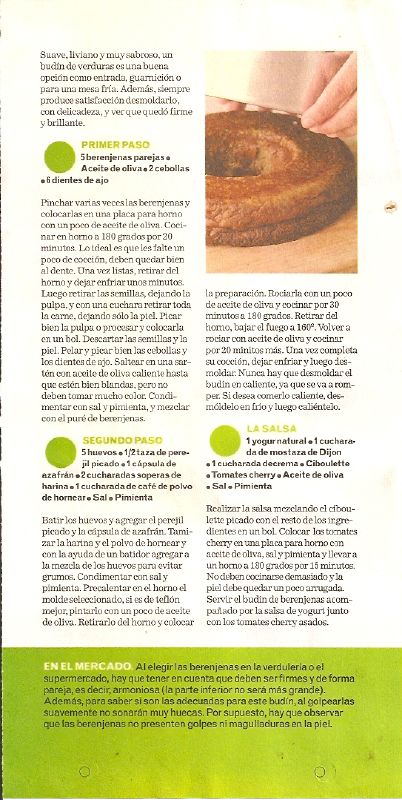
My photos didn´t come out as well as the ones in the magazine, of course, but I´m including the scans after the recipe in English so that those of you who speak Spanish have the original version.
If you love eggplant and onions, this is certainly the recipe for you, plus, it´s good for your waist, and how often can we say that of something truly yummy?

eggplant pudin with curry-ginger oil
(taken last night)

eggplant pudin
(taken today, oh lovely daylight)

eggplant pudin with curry-ginger oil

Curry-ginger oil (by Ming Tsei, original article)

Makes 1 quart Lasts 1 month, refrigerated
1 quart grapeseed or canola oil
1/2 cup peeled and minced fresh ginger
1 cup Madras curry powder
1. In a large, heavy saucepan, combine the oil with the ginger and heat over medium heat until the oil is fragrant and the ginger just begins to color, about 8 minutes. Remove from the heat and cool completely, about 20 minutes.
2. Meanwhile, place a large, heavy sauté pan over medium heat. Add the curry powder to the dry skillet and toast, stirring, until the curry powder smokes slightly, 8 to 10 minutes. Whisk in the ginger and oil, remove from the stove, and cool completely, 30 to 40 minutes.
3. Transfer the oil and spices to a 1- to 1 1/2-quart glass jar, scraping the pan well. Allow the mixture to stand until the oil and curry powder have separated completely, about 4 hours or overnight. The oil is now ready to use. Store in the refrigerator.

Eggplant puding (adapted from a recipe by Narda Lepes which appeared in Viva magazine)

5 big eggplants
olive oil (I used the curry ginger-oil)
2 onions
6 garlic cloves


1. Cut the eggplants in half, make some superficial square cuts, like this and sprinkle with cooking salt. Let rest for at least half an hour (this removes any bitterness the eggplant might have).
2. Rinse them and then wrap them in aluminum foil, place them in a pan and roast them for 20 minutes or so. They shouldn´t be too soft.
3. Let them cool for a few minutes and then scoop out the "meat".
4. Chop and sauté the onions and garlic cloves until tender but not golden.

Eggs 5
Chopped parsley, 1/2 cup
Saffron, 1 capsule (I didn´t use any because I didn´t have it)
All-purpose flour, 2 tablespoons
Baking powder, 1 teaspoon
Salt
Pepper

5. Gently whisk the eggs a little bit and add the parsley and the saffron (if you are using any, otherwise, add any other flavor you are using).
6. Sift the flour and baking powder and add it to the egg mix carefully so it won´t clot.
7. Add salt and pepper.
8. Preheat the selected pan in a 350F oven (180C), preferably non-stick, painted with a bit of olive oil (or the curry-ginger oil)
9. Place the mix in the hot pan and spray it with PAM. Cook for 30 minutes at 350F and then lower the oven to 300F and cook for an extra 20 minutes.
10. Let it cool before removing it from the pan.

Sauce
1 pot of plain yogurt
1 tablespoon of Dijon mustard (I didn´t use this and I think it was better because the pudin
has a strong flavor)
1 tablespoon of cream
Chives
Salt and pepper


budín de berenjenas

budín de berenjenas 2

Saturday, December 09, 2006

no-knead bread, part two

In case you haven´t heard about it, there´s a second part to Mark Bittman´s no-knead bread article with different options to tweak the recipe a little bit, different flavors that can be added and when, and responses to questions he received.

Some of the things that I found most interesting are the possibility to add different flours in small porcentages to give it something extra (I had originally used rye and semolina for the crust and it worked great).

"Up to 30 percent whole-grain flour works consistently and well, and 50 percent whole-wheat is also excellent. At least one reader used 100 percent whole-wheat and reported “great crust but somewhat inferior crumb,” which sounds promising. I’ve kept rye, which is delicious but notoriously impossible to get to rise, to about 20 percent. There is room to experiment."

One of the things that needed improvement in my loaf was flavor (though my main complaint was lack of humidity.) He mentions the fact that the amount of salt can be increased and he also gives some ideas for different flavorings.

"FLAVORINGS The best time to add caraway seeds, chopped olives, onions, cheese, walnuts, raisins or whatever other traditional bread flavorings you like is after you’ve mixed the dough. But it’s not the only time; you can fold in ingredients before the second rising. "

I would personally add some chopped confit tomatoes and chopped basil, but the possibilities are pretty much endless.

Another thing worth noticing is the fact that the 70F temperature is not something mandatory... you just need to adjust the rising time accordingly if it is hotter or colder.

I´m gonna try this again soon with some changes in the hot summer weather and see how it turns out. If you haven´t tried this bread, please do, it is easy and the results are really good. If it at least helps erase some fears about bread baking, then I think it is a true success.

Thursday, December 07, 2006

this is what all the fuss is about

quinoa salad

I know food trends can get pretty annoying. And one would think the whole quinoa craze would be no different. But I can personally attest that it tastes great and it has like every protein ever discovered or something like that.
Being on the healthy food wagon, I´ve tried different things with quinoa, and so far, I´ve loved it both toasted and boiled in a sort of salad.
I´ll be giving you both choices, though I recommend eliminating the toasting step if you are using strong condiments because it would be overpowering.
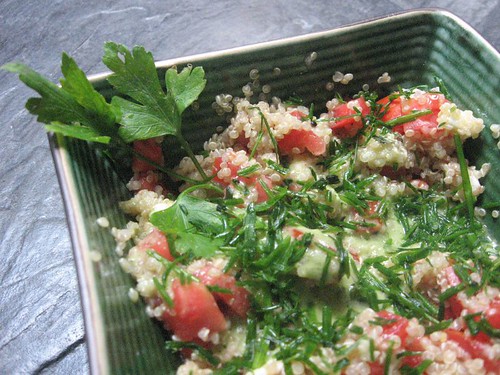
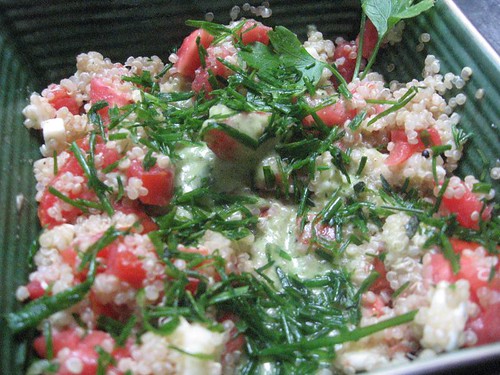
My favorite quinoa dish so far is one I sort of invented (in all modesty, of course): it has boiled quinoa (always previously rinsed), a lime-chile vinaigrette from another recipe, feta cheese, tomatoes and ciboulette. The lime-chile vinaigrette is just so rich and intense, yet fresh at the same time. It is originally used with acorn squash, but I had some leftovers and it worked wonders with the quinoa and the rest of the ingredients, so please, try it, either with this dish or with pretty much anything else.

quinoa salad with lime-chile vinagrette

veggie heaven

Lime-chile vinaigrette (adapted from Epicurious)
1/2 teaspoon salt
4 tablespoons olive oil
1 or 2 garlic cloves
1 1/2 tablespoons fresh lime juice, or to taste
1 to 2 teaspoons finely chopped fresh hot red chile, including seeds
2 tablespoons chopped fresh cilantro (I used cilantro seeds, since I didn´t have fresh cilantro and then added chopped fresh parsley)

Mince garlic and mash to a paste with remaining 1/4 teaspoon salt. Transfer paste to a small bowl and whisk in lime juice, chile (to taste), cilantro, and remaining 1/4 cup oil until combined.


Toasted quinoa (serves 4) (for regular boiled quinoa, skip step 2)

4 cups of quinoa

8 cups of water

1 teaspoon of salt

1. Rinse the quinoa thoroughly in order to get rid of a natural bitter cover it has. It just takes a few minutes. When the water is clean, you are good to go. Strain it.

2. Toast the quinoa in a pan at medium heat, stirring often for 5 minutes or so.

3. Put the quinoa and the water in a pan and bring to a boild. Reduce heat and let simmer until the water is absorbed and the quinoa is quite puffy, which happens about 15 minutes after the water starts boiling.

4. Mix with the vinaigrette and the rest of the ingredients (a bit of feta cheese, tomato and ciboulette in this case.)

Tuesday, December 05, 2006

stubborness times infinity

Even though I find many recipes interesting, it is hard for me to be surprised at a recipe, either the technique or the combination of flavors. The recipe I´m about to comment surprised me with both. First of all, it´s a syrup made with carrot juice and no extra sugar. And then it has smoked chipotles... now maybe it´s just me, but carrots and chiles is not the first ingredient combination that comes to mind.
I saw this recipe on tv, while watching a show called Simply Ming (apparently it airs on a public network in the US.) Anyway, the show starts with a master recipe, which Ming later uses in 3 or 4 recipes... which makes total sense to me as a cook, because that´s the right frame of mind to cook, you just take something you know and start coming up with ways to do different things with it.

carrot-chipotle syrup

So this recipe had my name written all over it. But there was a tiny problem: it called for carrot juice and I don´t have a juicer (or a place to store it if I were to buy it) and they don´t sell carrot juice at grocery stores here. Yet, I was not to be denied, so I thought I had the perfect solution for my little problem: I would process the carrot with some water, then strain it, and voilá, carrot juice. While it seemed to work at first, physics kicked my butt and separated the tiny carrot fragments and the water as it got heated. How wonderful!!! So I put the carrot pulp back in, cooked it for 40 minutes or so, and then processed it with the chipotle and the oil.

And even though my outcome is far from the original one. It tastes wonderful, so I began using it with vegetables and in different concoctions.

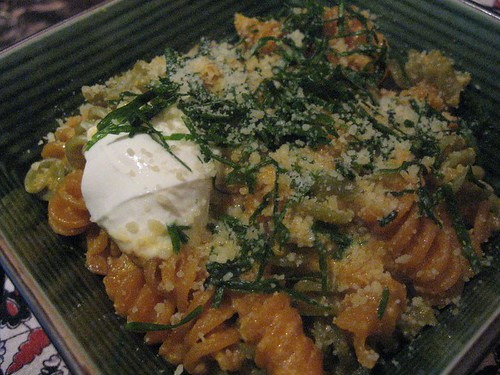
Here it is with pasta, cream cheese and some ciboullete (a good trick is to boil the pasta and strain it when there are just 2 minutes or so left of the total cooking time, and pour it in the pan with the sauce and cook it there for the remainding 2 minutes. That way, the sauce and the pasta merge flavors way better.)

pasta with carrot-jalapeño syrup

pasta with carrot-jalapeño syrup


I recommend trying this one out, it is really special.

Now all I have to do is find someone with a freaking juicer I can borrow!


Carrot-chipotle syrup (from Ming Tsai, http://simplyming.org/recipes/118_Carrot-Chipotle_Sy.html)

Ming says: When you reduce fruit and vegetable juices, they become more intensely themselves. Treated that way, they're perfect flavoring bases; witness this syrup made from reduced carrot juice and smoky-hot chipotle in adobo. I fell in love with that seasoning when I cooked in Santa Fe; here, it complements the reduction's sweetness beautifully, making the syrup a very tasty, as well as useful, ingredient.

Makes 1 cup
2 quarts fresh carrot juice
1 teaspoon chopped chipotle in adobo
3/4 cup grapeseed oil
Kosher salt and freshly ground black pepper to taste

1. In a large non-reactive saucepan, bring the carrot juice to a gentle simmer over low heat. Reduce the juice until all the liquid is evaporated, leaving a wet residue, about 45 minutes.
2. With a heat-resistant rubber spatula, scrape the residue from the pan and transfer it to a blender. Add the chipotle in adobo, and blend at high speed.
3. With the machine running, drizzle in the oil very slowly at first until the mixture is emulsified, then add the oil more quickly to prevent the sauce from breaking. Season with salt and pepper. Use or store.
Lasts 2 weeks, refrigerated.

TRY IT This makes a great sauce for most seafood, particularly for cod, bass, scallops, and lobster.Drizzle the syrup over vegetable medleys; it adds a hint of sweetness and "marries" all the flavors.For extra flavor, use the syrup to encircle servings of seafood risotto.
MING'S TIPS Juicing fresh carrots with a juicer is best, but the store-bought juice works well, too.To ensure the syrup doesn't separate, add the oil to the blender very slowly at first. As soon as thickening occurs, add the oil more quickly. (The initial slow addition allows the mixture to combine; the faster addition prevents the mixture from getting too hot, which can cause it to separate.)

Wednesday, November 22, 2006

market day

mushrooms stuffed with sweet potatoes and onion 2


Every Wednesday, there´s a food market in the park right in front of my house, which I was unaware of when I bought the apartment, but is an awesome perk of living here. Even though it´s not a fancy food market, I do get the freshest stuff there, and at half the price of the fruit and vegetable stores in this particular neighbourhood. (I live in Palermo, no, not Palermo, Italy, but Palermo in Buenos Aires.) Well, I guess the comparison in general prices would be like comparing prices in New York with those in mmmm I don´t know, Alabama. Being "the" fashionable neighbourhood, it is assumed they can charge you more for a freaking tomato hahahaha I know I´m getting sidetracked here, but I can´t forget to mention that snobism reaches such heights in this area that we have different divisions like "Palermo Soho" and "Palermo Hollywood". Yes, indeed, Palermo is too freaking cool for South America, we belong in LA or London. My goodness!!!

Anyway, that weight off my chest, I can honestly say I love it here. It´s full of little design shops, artisan fairs, parks, it´s got a great night life, AND the traffic doesn´t suck, which is a big consideration to be had when living in a big city. I can even hear birds singing and stuff like that instead of the sound of cars rushing by.

Ok, focus, Marcela. Back to our regular program. As I was saying, every Wednesday I have the great joy of crossing the street and browsing through lovely produce. Being a fan of all things vegetable, it really is heaven on earth.

Today I loaded up on veggies, so tonight´s meal needed to involve at least some of them (I´m ashamed to say that sometimes I forget to cook something I had bought and I realize my profanity when I open the fridge to find a dying bouquet of basil or lettuce.)

I had to go with something quick because dinner time was approaching fast, so I chose a variation I had seen in "elgourmet.com" magazine (Argentine magazine and food channel, www.elgourmet.com): stuffed mushrooms with mashed sweet potatoes/yams and onions. My first reaction was "that´s a weird combination". Yet, since it was a recipe by my beloved Narda Lepes, I had to give it a go.

mushrooms stuffed with sweet potatoes and onion


There´s not much of a recipe for it. You simply remove the stems of the mushrooms, and keep them for later. You make a thick puree with the sweet potatoes, add some browned onions and the mushroom stems, I added some pesto I had in the fridge, but you can add pretty much anything you want there (for instance, the original recipe had some chicken.) You stuff the mushrooms with the mix using a spoon, then sprinkle some parmesan over it, shove it in a 400°F oven for around 10-15 minutes and voilá! I served it with a zuchinni salad to give it a fresh touch.

Sunday, November 19, 2006

summer... and all that comes along with it

Summer is approaching (or should I say looming?) for those of us in the southern hemisphere, and with it come unwanted compromises (you know, bathing suit or muffins?) Having gained a few pounds during the last year, I´m leaning towards the bathing suit, that is, I probably won´t be wearing one very often, but at least I know I´m getting closer to where I was a while ago.
That said, I could never do Atkins or some strange diet like that. First of all, I love food way too much. Good food, especially carbs. Besides, diets don´t seem to be made for people who love to cook... and who are partial to flavorful food. Being a vegetable lover helps quite a bit, being a baked-goods lover does not. So I´m currently implementing a personal diet I like to call "Pip´s diet", which basically comes down to eating smaller amounts of carbs, coupling them with big salads with small amounts of light dressings concocted by myself, eating cookies and cakes less frequently, and exercising as often as possible.
The thing with regular diets is that you can´t live with them for the rest of your life. What I´m trying to device is something that works for me and doesn´t require counting points or calories, eating like crap or starving myself.

So, anyway, long story short, I started a food blog pretty much at the exact time I started this "diet." But, surprisingly, it´s actually helping me come up with good recipes that aren´t too bad for you. It sort of forces me not to get caught up in a boring menu.

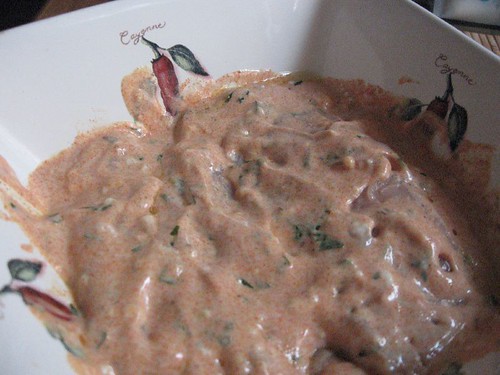
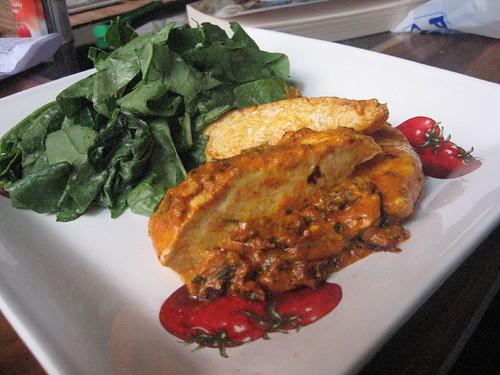
A few days ago, I recalled a tandoori chicken recipe I had seen on tv a few months ago. Since I didn´t have a tandoori spice mix, I googled it to find the basic spices for it. There were quite a few differences between recipes, but it´s mainly turmeric, ginger, cayenne, paprika, cumin, coriander, a bit of garlic, some garam masala (if you have some.) I personally used turmeric, ginger, red pepper flakes, cayenne, cumin, a bit of pesto oil mix I had in the fridge (chopped garlic and parsley.) I simply mixed that in with some plain yogurt. Marinated the chicken in it for just an hour or so because I was in a hurry (it´s recommended that you marinate the chicken for 4-24 hours in it, then take it out of the fridge 30 minutes before grilling it.)

Marinating...
tandoori chicken in the making

All done...
tandoori chicken

Given that my "recipe" is not precise enough. I´m pasting a similar recipe from the Food Network´s site.


Grilled Tandoori Chicken
Recipe courtesy Emeril Lagasse, 2001 http://www.foodnetwork.com/food/recipes/recipe/0,1977,FOOD_9936_16385,00.html

1 (4 to 4 1/2 pound) chicken, cut into 8 pieces, skin removed
2 tablespoons vegetable oil
1/2 cup chopped white onion
2 tablespoons chopped garlic
2 tablespoons chopped ginger
1 teaspoon finely chopped serrano or jalapeno pepper, stem and seeds removed
1 tablespoon paprika
1 1/2 teaspoons salt
1 teaspoon ground cumin
1 teaspoon turmeric
1 teaspoon ground coriander
1 teaspoon garam masala
1/2 teaspoon cayenne
1/2 cup plain yogurt
1 tablespoon fresh lemon juice

1. With a fork, prick holes in the chicken pieces. Using a knife, cut diagonal slices 1-inch apart, and 1/2-inch deep into the larger pieces. Place the chicken in a baking dish.
2. In a blender, combine the oil, onion, garlic, ginger, pepper, and process on high speed to a paste. Add the paprika, salt, cumin, turmeric, coriander, garam masala, and cayenne, and process until well blended. Add the yogurt and lemon juice, and process to a smooth sauce, scraping down the sides to combine all the ingredients.
3. Pour the marinade over the chicken. Turn to coat evenly, rubbing the marinade into the holes and slits. Cover tightly with plastic wrap, refrigerate for at least 4 hours, and up to 24 hours, turning occasionally.
4. Preheat a grill.
5. Remove the chicken from the marinade. Place on the grill and cook for 8 to 10 minutes on the first side. Turn, baste as needed, and cook on the second side for 8 to 10 minutes. Turn and continue cooking, as necessary until the chicken is cooked through, but still tender, about 25 to 30 minutes. (Alternately, bake in a preheated 425 degrees F oven on a baking sheet for 35 minutes.)

There´s a somewhat different recipe at epicurious, it´s a tandoori chicken sandwich with a spiced mayo. It sounds really good. Here´s the link: http://www.epicurious.com/recipes/recipe_views/views/2344

Wednesday, November 15, 2006

the bread "not knead around the world"

For anyone recently addicted to food blogs like myself, this has been an eventful week. See, the New York Times published a bread recipe last Wednesday that had everyone quite excited... including me.
It´s a no-knead bread recipe invented by Jim Lahey from the Sullivan Street Bakery in NY which involves tiny amounts of instant yeast and huge amounts of rising time. And of course, it doesn´t require any kneading.
At first, I was quite afraid of trying it out because even turning on the oven is quite a feat in Buenos Aires these days. Summer temperatures are here in all their "glory", so the natural thing to do is to stay away from anything that could increase the heat even more.
Yet, after seeing gourgeous pictures of said bread from several bloggers and hearing endless praise for this seemingly miraculous piece of culinary art, I decided to disregard my already-defeated common sense and go ahead with this whole thing.
Having tried my hand at bread and pizza dough before, I´m not afraid of kneading. In fact, I like to knead... and recommend it to anyone having a bad day, you say therapists, I say bread making!
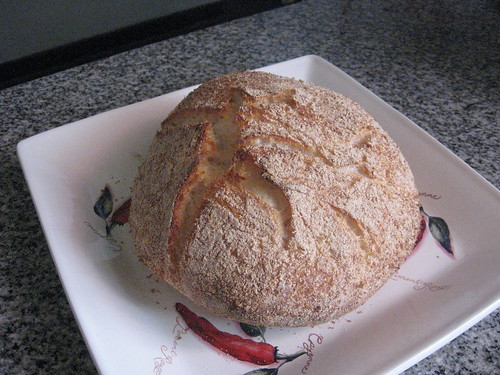
Thus, the preparation itself wasn´t scary at all. It did require more waiting than usual, but I got this amazing loaf out of it.
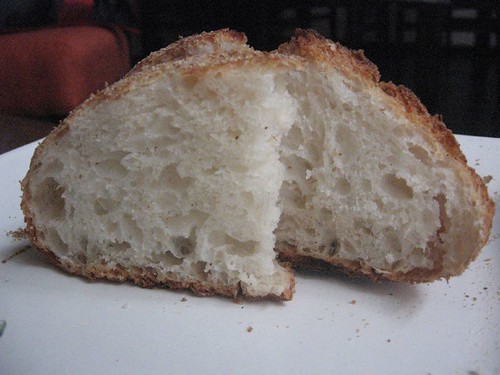
Now, when it actually came down to slicing the bread, it was drier than what I anticipated. It was still gorgeous and full of air, but a bit dry for my liking. Granted it doesn´t contain any fat, but I think the real culprit could be the fact that I had to use a Pyrex (the article mentioned it as one of the possibilities), instead of a heavy iron pot, because even though I do have one, it´s for stove-top cooking since the handles are made of a plastic material. My theory is that the closure isn´t as tight, so some humidity might have been lost there.
I still recommend this bread. In fact, I´m gonna give it another shot soon with some minor modifications and see how it goes. If any of you have made it and want to share your experience, give me some tips or whatever (that is, assuming someone actually reads this thing), please do so in the commentaries section or writing to my email address.

Here´s my lovely loaf (I´ll update tomorrow with some more pictures.)
behold the loveliness

...

As I had promised, here are some other pics.

sponge

A nice afternoon snack:
IMG_0242

It is coming to get you!!!
come to mama


No knead bread (from the NYT Dining Section, nov 8th, 2006.)

Yields one 1 1/2 pound loaf
3 cups all-purpose or bread flour, more for dusting
¼ teaspoon instant yeast
1¼ teaspoons salt
Cornmeal or wheat bran as needed.

1. In a large bowl combine flour, yeast and salt. Add 1 5/8 cups water, and stir until blended; dough will be shaggy and sticky. Cover bowl with plastic wrap. Let dough rest at least 12 hours, preferably about 18, at warm room temperature, about 70 degrees.

2. Dough is ready when its surface is dotted with bubbles. Lightly flour a work surface and place dough on it; sprinkle it with a little more flour and fold it over on itself once or twice. Cover loosely with plastic wrap and let rest about 15 minutes.

3. Using just enough flour to keep dough from sticking to work surface or to your fingers, gently and quickly shape dough into a ball. Generously coat a cotton towel (not terry cloth) with flour, wheat bran or cornmeal; put dough seam side down on towel and dust with more flour, bran or cornmeal. Cover with another cotton towel and let rise for about 2 hours. When it is ready, dough will be more than double in size and will not readily spring back when poked with a finger.

4. At least a half-hour before dough is ready, heat oven to 450 degrees. Put a 6- to 8-quart heavy covered pot (cast iron, enamel, Pyrex or ceramic) in oven as it heats. When dough is ready, carefully remove pot from oven. Slide your hand under towel and turn dough over into pot, seam side up; it may look like a mess, but that is O.K. Shake pan once or twice if dough is unevenly distributed; it will straighten out as it bakes. Cover with lid and bake 30 minutes, then remove lid and bake another 15 to 30 minutes, until loaf is beautifully browned. Cool on a rack.