Thursday, November 30, 2006

the sweet life

As you know if you have been reading this for a while (I wouldn´t know, since no one cares to comment :P ), I´m trying to stay away from my much-loved baked goods. It´s working pretty well because it allows me to discover new things in the savory and light department, but sometimes it is hard, like when I read food blogs and see these amazing photos of cakes, cookies, et al.
This time, the culprit was Deb from Smitten Kitchen. She published a wonderful cake made famous by her mom and gave it such high praise that I felt compelled to try it myself. Yes, I know it´s cheap to blame it on her, but oh well, whatever it takes to clean my guilty oh so guilty concience lol

Here is the recipe (originally published here) followed by my comments, changes and photos.

Chocolate Chip Sour Cream Cake

1 stick butter, at room temperature
1½ cups sugar
3 eggs, separated
1½ teaspoons vanilla extract
16 ounces plain yogurt or sour cream
3 cups all-purpose flour
1 teaspoon baking powder
1½ teaspoons baking soda

12 ounces chocolate chips
½ cup sugar
1 teaspoon cinnamon


1. Preheat oven to 350 degrees F (180 C)

2. In a large bowl, cream butter and 1½ cups sugar, then mix in the egg yolks and vanilla. Sift flour, baking soda and baking powder together into a separate bowl. Alternately add sour cream and then dry ingredients into butter mixture. Beat eggs whites until stiff, then fold into batter. Mix last ½ cup sugar and cinnamon together in a separate, small dish.

3. In a greased 9″x13″ pan, pour in half of the cake batter. Sprinkle the top with half of the cinnamon-sugar mixture and half of the chocolate chips. Pour remaining batter on top, sprinkling the top with the remaining cinnamon-sugar and chocolate chips.

4. Bake for 40 to 50 minutes, or until a tester comes out clean.


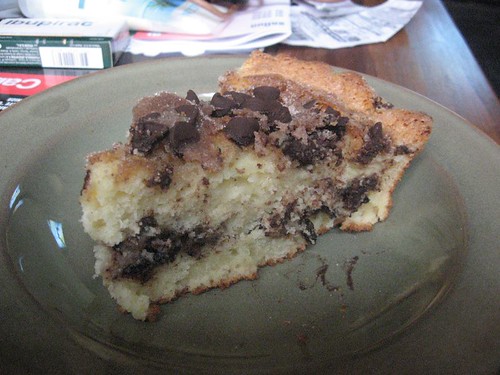
The cake is nothing short of amazing, perfect flavor, very moist, just lovely. I made it with plain yogurt instead of sour cream because we don´t use sour cream in Argentina. I also added a bit of orange zest to the cake mix simply because orange+cinamon+chocolate is just heaven on earth (next time I´ll add some more for it to have more of a presence).

Since I still had like a quarter of it left over even after some friends had helped me dispose of it (I mean, with friends like that, the world would be such a better place, such generosity and sacrifice!!!), I just froze the rest of it. When another lucky friend came over on Tuesday, I defrosted a piece with a minute in the microwave and then another minute in a non-stick pan, and it was amazing. So freeze away (that is, if you have any leftovers to begin with).

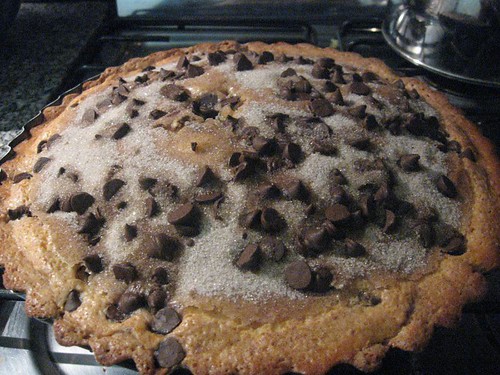
Here it is in all its glory. I hope you enjoy this little detour in all things healthy and light ;)
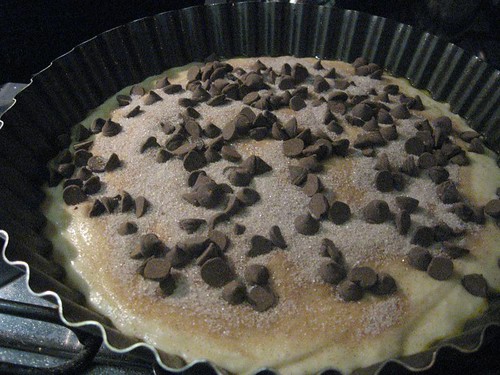
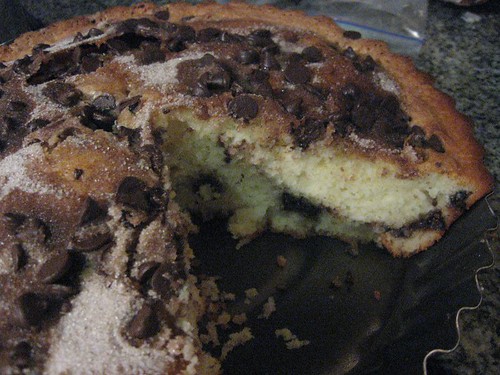
chocolate chip and yogurt cake, unbaked

chocolate chip and yogurt cake

chocolate chip and yogurt cake

chocolate chip and yogurt cake

Saturday, November 25, 2006

bundles of joy

Yesterday was a great day, and it had nothing to do with the fact that it was Friday, or that I didn´t have a tight deadline at work, so I could afford to procrastinate. In fact, it had started out pretty badly since I went to bed at 2am and had trouble sleeping, fully aware that I was going to have to wake up at 8.30 in the morning.

Thing is, I had to got to the vet to find out if my Golden retriever, Maia, was pregnant. To make a long story short, I moved out of my parents´ house a few months ago, leaving my beloved Maia there with them. I really had no choice, even though I adore her, she´s the family dog, not my own, and plus she´s used to having an endless backyard to play in, a big house to roam, and so on. Anyway, it´s not as if I moved out to another city or anything, though I did move to the other side of the city, with a 75-minute bus ride in between. But I do see Maia every week... and the family, of course lol but this is an entry about her.

Anyway, Maia had had a very passionate love story with another Golden named Jamaica about a month ago. By very passionate I mean 3 sexual escapades in less than 24 hours. Yes, I know, poor Jamaica, he was struggling, but Maia was relentless, she went into total ninfo-mode and kept harrassing the poor dog lol

We had yet to figure out whether this lovely love affair had produced little bundles of joy. So yesterday we had scheduled an ecography (yes, they do those to dogs as well.) And indeed, the family is going to get bigger :) Not as big as we had expected since apparently she´s only having 4-6 puppies, which is quite little for a big breed. It´s quite impossible to explain how great that is for me. I mean, puppies playing, puppies running in the backyard all clumsily, can life get any cuter than that? AND, I´m gonna take one of them to come and live with me, which is going to be quite a challenge and a big change in my routine, but I just know I´m gonna love the whole thing.

Anyway, I present you one of the tiny little things (I mean, they really are tiny at this point, only 2.35 cm each.)
cachorrito

cachorritos

And this is the future mother:
maia fondo 2
Maia_una vida muy dura
maia_lady
maia sosteniendo puerta

Wednesday, November 22, 2006

market day

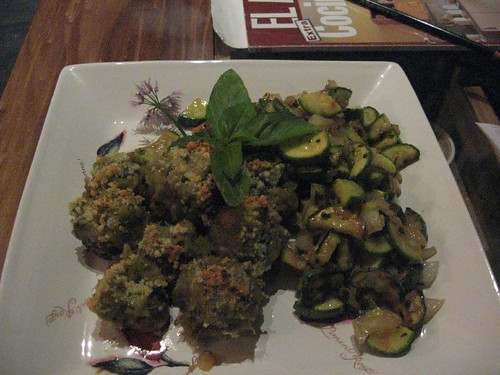
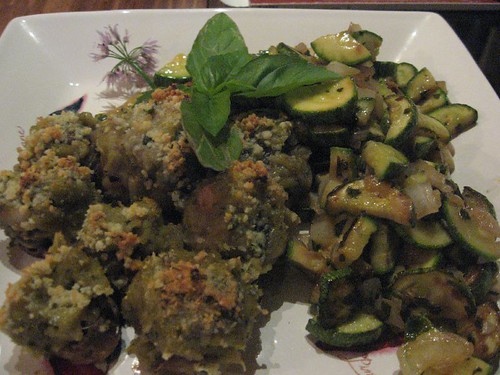
mushrooms stuffed with sweet potatoes and onion 2


Every Wednesday, there´s a food market in the park right in front of my house, which I was unaware of when I bought the apartment, but is an awesome perk of living here. Even though it´s not a fancy food market, I do get the freshest stuff there, and at half the price of the fruit and vegetable stores in this particular neighbourhood. (I live in Palermo, no, not Palermo, Italy, but Palermo in Buenos Aires.) Well, I guess the comparison in general prices would be like comparing prices in New York with those in mmmm I don´t know, Alabama. Being "the" fashionable neighbourhood, it is assumed they can charge you more for a freaking tomato hahahaha I know I´m getting sidetracked here, but I can´t forget to mention that snobism reaches such heights in this area that we have different divisions like "Palermo Soho" and "Palermo Hollywood". Yes, indeed, Palermo is too freaking cool for South America, we belong in LA or London. My goodness!!!

Anyway, that weight off my chest, I can honestly say I love it here. It´s full of little design shops, artisan fairs, parks, it´s got a great night life, AND the traffic doesn´t suck, which is a big consideration to be had when living in a big city. I can even hear birds singing and stuff like that instead of the sound of cars rushing by.

Ok, focus, Marcela. Back to our regular program. As I was saying, every Wednesday I have the great joy of crossing the street and browsing through lovely produce. Being a fan of all things vegetable, it really is heaven on earth.

Today I loaded up on veggies, so tonight´s meal needed to involve at least some of them (I´m ashamed to say that sometimes I forget to cook something I had bought and I realize my profanity when I open the fridge to find a dying bouquet of basil or lettuce.)

I had to go with something quick because dinner time was approaching fast, so I chose a variation I had seen in "elgourmet.com" magazine (Argentine magazine and food channel, www.elgourmet.com): stuffed mushrooms with mashed sweet potatoes/yams and onions. My first reaction was "that´s a weird combination". Yet, since it was a recipe by my beloved Narda Lepes, I had to give it a go.

mushrooms stuffed with sweet potatoes and onion


There´s not much of a recipe for it. You simply remove the stems of the mushrooms, and keep them for later. You make a thick puree with the sweet potatoes, add some browned onions and the mushroom stems, I added some pesto I had in the fridge, but you can add pretty much anything you want there (for instance, the original recipe had some chicken.) You stuff the mushrooms with the mix using a spoon, then sprinkle some parmesan over it, shove it in a 400°F oven for around 10-15 minutes and voilá! I served it with a zuchinni salad to give it a fresh touch.

Sunday, November 19, 2006

summer... and all that comes along with it

Summer is approaching (or should I say looming?) for those of us in the southern hemisphere, and with it come unwanted compromises (you know, bathing suit or muffins?) Having gained a few pounds during the last year, I´m leaning towards the bathing suit, that is, I probably won´t be wearing one very often, but at least I know I´m getting closer to where I was a while ago.
That said, I could never do Atkins or some strange diet like that. First of all, I love food way too much. Good food, especially carbs. Besides, diets don´t seem to be made for people who love to cook... and who are partial to flavorful food. Being a vegetable lover helps quite a bit, being a baked-goods lover does not. So I´m currently implementing a personal diet I like to call "Pip´s diet", which basically comes down to eating smaller amounts of carbs, coupling them with big salads with small amounts of light dressings concocted by myself, eating cookies and cakes less frequently, and exercising as often as possible.
The thing with regular diets is that you can´t live with them for the rest of your life. What I´m trying to device is something that works for me and doesn´t require counting points or calories, eating like crap or starving myself.

So, anyway, long story short, I started a food blog pretty much at the exact time I started this "diet." But, surprisingly, it´s actually helping me come up with good recipes that aren´t too bad for you. It sort of forces me not to get caught up in a boring menu.

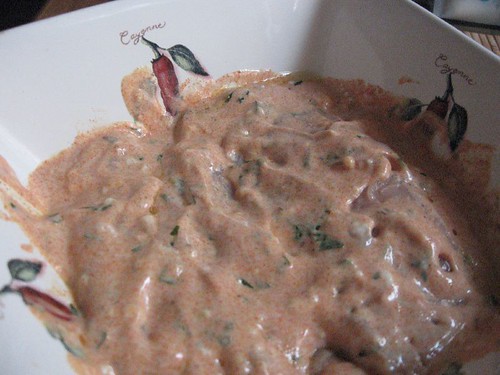
A few days ago, I recalled a tandoori chicken recipe I had seen on tv a few months ago. Since I didn´t have a tandoori spice mix, I googled it to find the basic spices for it. There were quite a few differences between recipes, but it´s mainly turmeric, ginger, cayenne, paprika, cumin, coriander, a bit of garlic, some garam masala (if you have some.) I personally used turmeric, ginger, red pepper flakes, cayenne, cumin, a bit of pesto oil mix I had in the fridge (chopped garlic and parsley.) I simply mixed that in with some plain yogurt. Marinated the chicken in it for just an hour or so because I was in a hurry (it´s recommended that you marinate the chicken for 4-24 hours in it, then take it out of the fridge 30 minutes before grilling it.)

Marinating...
tandoori chicken in the making

All done...
tandoori chicken

Given that my "recipe" is not precise enough. I´m pasting a similar recipe from the Food Network´s site.


Grilled Tandoori Chicken
Recipe courtesy Emeril Lagasse, 2001 http://www.foodnetwork.com/food/recipes/recipe/0,1977,FOOD_9936_16385,00.html

1 (4 to 4 1/2 pound) chicken, cut into 8 pieces, skin removed
2 tablespoons vegetable oil
1/2 cup chopped white onion
2 tablespoons chopped garlic
2 tablespoons chopped ginger
1 teaspoon finely chopped serrano or jalapeno pepper, stem and seeds removed
1 tablespoon paprika
1 1/2 teaspoons salt
1 teaspoon ground cumin
1 teaspoon turmeric
1 teaspoon ground coriander
1 teaspoon garam masala
1/2 teaspoon cayenne
1/2 cup plain yogurt
1 tablespoon fresh lemon juice

1. With a fork, prick holes in the chicken pieces. Using a knife, cut diagonal slices 1-inch apart, and 1/2-inch deep into the larger pieces. Place the chicken in a baking dish.
2. In a blender, combine the oil, onion, garlic, ginger, pepper, and process on high speed to a paste. Add the paprika, salt, cumin, turmeric, coriander, garam masala, and cayenne, and process until well blended. Add the yogurt and lemon juice, and process to a smooth sauce, scraping down the sides to combine all the ingredients.
3. Pour the marinade over the chicken. Turn to coat evenly, rubbing the marinade into the holes and slits. Cover tightly with plastic wrap, refrigerate for at least 4 hours, and up to 24 hours, turning occasionally.
4. Preheat a grill.
5. Remove the chicken from the marinade. Place on the grill and cook for 8 to 10 minutes on the first side. Turn, baste as needed, and cook on the second side for 8 to 10 minutes. Turn and continue cooking, as necessary until the chicken is cooked through, but still tender, about 25 to 30 minutes. (Alternately, bake in a preheated 425 degrees F oven on a baking sheet for 35 minutes.)

There´s a somewhat different recipe at epicurious, it´s a tandoori chicken sandwich with a spiced mayo. It sounds really good. Here´s the link: http://www.epicurious.com/recipes/recipe_views/views/2344

Wednesday, November 15, 2006

the bread "not knead around the world"

For anyone recently addicted to food blogs like myself, this has been an eventful week. See, the New York Times published a bread recipe last Wednesday that had everyone quite excited... including me.
It´s a no-knead bread recipe invented by Jim Lahey from the Sullivan Street Bakery in NY which involves tiny amounts of instant yeast and huge amounts of rising time. And of course, it doesn´t require any kneading.
At first, I was quite afraid of trying it out because even turning on the oven is quite a feat in Buenos Aires these days. Summer temperatures are here in all their "glory", so the natural thing to do is to stay away from anything that could increase the heat even more.
Yet, after seeing gourgeous pictures of said bread from several bloggers and hearing endless praise for this seemingly miraculous piece of culinary art, I decided to disregard my already-defeated common sense and go ahead with this whole thing.
Having tried my hand at bread and pizza dough before, I´m not afraid of kneading. In fact, I like to knead... and recommend it to anyone having a bad day, you say therapists, I say bread making!
Thus, the preparation itself wasn´t scary at all. It did require more waiting than usual, but I got this amazing loaf out of it.
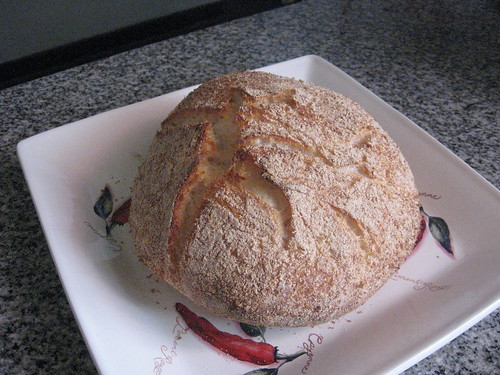
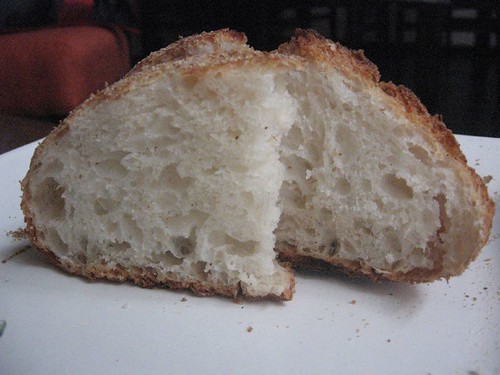
Now, when it actually came down to slicing the bread, it was drier than what I anticipated. It was still gorgeous and full of air, but a bit dry for my liking. Granted it doesn´t contain any fat, but I think the real culprit could be the fact that I had to use a Pyrex (the article mentioned it as one of the possibilities), instead of a heavy iron pot, because even though I do have one, it´s for stove-top cooking since the handles are made of a plastic material. My theory is that the closure isn´t as tight, so some humidity might have been lost there.
I still recommend this bread. In fact, I´m gonna give it another shot soon with some minor modifications and see how it goes. If any of you have made it and want to share your experience, give me some tips or whatever (that is, assuming someone actually reads this thing), please do so in the commentaries section or writing to my email address.

Here´s my lovely loaf (I´ll update tomorrow with some more pictures.)
behold the loveliness

...

As I had promised, here are some other pics.

sponge

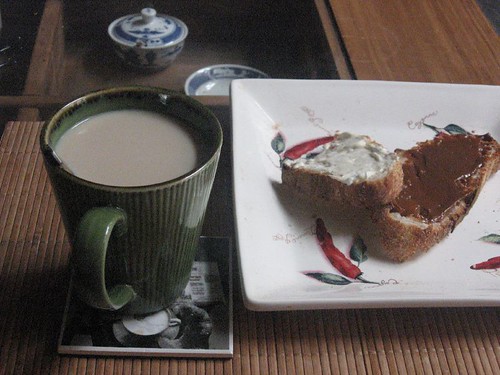
A nice afternoon snack:
IMG_0242

It is coming to get you!!!
come to mama


No knead bread (from the NYT Dining Section, nov 8th, 2006.)

Yields one 1 1/2 pound loaf
3 cups all-purpose or bread flour, more for dusting
¼ teaspoon instant yeast
1¼ teaspoons salt
Cornmeal or wheat bran as needed.

1. In a large bowl combine flour, yeast and salt. Add 1 5/8 cups water, and stir until blended; dough will be shaggy and sticky. Cover bowl with plastic wrap. Let dough rest at least 12 hours, preferably about 18, at warm room temperature, about 70 degrees.

2. Dough is ready when its surface is dotted with bubbles. Lightly flour a work surface and place dough on it; sprinkle it with a little more flour and fold it over on itself once or twice. Cover loosely with plastic wrap and let rest about 15 minutes.

3. Using just enough flour to keep dough from sticking to work surface or to your fingers, gently and quickly shape dough into a ball. Generously coat a cotton towel (not terry cloth) with flour, wheat bran or cornmeal; put dough seam side down on towel and dust with more flour, bran or cornmeal. Cover with another cotton towel and let rise for about 2 hours. When it is ready, dough will be more than double in size and will not readily spring back when poked with a finger.

4. At least a half-hour before dough is ready, heat oven to 450 degrees. Put a 6- to 8-quart heavy covered pot (cast iron, enamel, Pyrex or ceramic) in oven as it heats. When dough is ready, carefully remove pot from oven. Slide your hand under towel and turn dough over into pot, seam side up; it may look like a mess, but that is O.K. Shake pan once or twice if dough is unevenly distributed; it will straighten out as it bakes. Cover with lid and bake 30 minutes, then remove lid and bake another 15 to 30 minutes, until loaf is beautifully browned. Cool on a rack.

Thursday, November 09, 2006

a tart to remember

Tarts are one of my favorite meals. No, that doesn´t mean I am a tart, just that I like them.

And given the fact that you can basically use anything you have in the refrigerator, throw it in there and you have a meal, I usually resort to making all sorts of tarts/pies/quishes, whatever you wanna call it.

The usual thing here in Argentina is for people to buy the pastry at the grocery store. Yet it´s so freaking simple to make it yourself with a food processor that I just don´t see the point. I´ve seen my mom do it in 10 minutes for as long as I can recall. As with most people, my mom is my inspiration in terms of cooking, it´s where I get my attitute towards cooking and food... luckily, she is a good model in that respect.

So, anyway, recently I began experimenting more with the pastry, trying to reduce the fat content as much as possible, but to add tons of flavor. I had run out of fresh pesto, so I just added a clove of garlic to the flour and the salt in the food processor and processed that a bit before adding the liquids. You have no idea how good that tastes. Then you can add anything else for flavor. I added a bit of sundried-tomatoes-and-parmessan powder and some red pepper flakes to give it a bit of a kick, but you can basically add any flavor you like. When I make confit tomatoes in the oven, I use the left-over oil that is filled with tomato flavor to replace with normal vegetable oil I generally use.

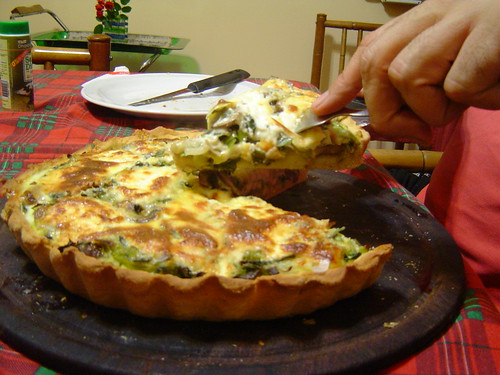
Last week, I made a leek and mushroom tart. Awesome combination in my opinion. I´ll try to come up with a decent recipe after the photo, but you´ll have to use your common sense as well as the recipe because this are all aproximations, since I don´t use any recipes but follow my guts.

leek and mushroom pie

Leek and mushroom tart

Pastry
self-rising flour (5 cups*)
salt (around 1 tablespoon)
raw garlic, peeled (1 or 2 cloves)
red pepper flakes (2 teaspoons)
sundried-tomatoes-and-parmessan powder (1 tablespoon**)
vegetable oil (around 2 tablespoons)
water, room temperature (around 1/2 a cup)

*It can be all-purpose with 1 or 2 teaspoons of baking powder.
**Again, you can replace this simply adding sundried tomatoes when you add the garlic and processing it, and some parmessan cheese.

Instructions

1. Put the flour, salt and garlic in a food processor and blend until you think the garlic has been turned into powder.
2. Add all the liquids and blend again. Add more water bit by bit if necessary until you achieve the right consistency.
3. Remove dough from the machine and knead with some extra flour until the dough is completely homogeneous. Cover it with a plastic wrap and put it in the refrigerator while you prepare the filling (you can skip this step if in a hurry.)
4. Roll the dough till you achieve the desired thickness, put it in a pie tin, pinch with a fork and place in 350°F oven (180°C) for 5-10 minutes.

Filling

leeks (5 big ones)
onion (1 medium)
salt (to taste)
mushrooms (around 10 if you are using champignones, 5 if you are using portobello)
cheese (mozzarella or any other soft cheese, to taste really, I probably used 1 cup or somthing like that.)
eggs (1 big one)
low-fat milk (1/4 cup)
grated parmessan cheese (1/2 a cup)


Instructions
1. Sauté the chopped leeks and the onion with some salt until they are tender. Add the mushrooms, chopped, while the mix is still hot.
2. Cut the cheese in thin layers or in small squares.
3. Beat the egg with the milk just to mix them a little bit and add some salt if you like. You can also add any herbs or flavors to this mix.
4. Mix the eggs and milk with the vegetable mix. Pour over the pastry (To avoid any problems with moisture later on, I add some bread crumbs or panko over the pastry before pouring the vegetable mix.)
5. Cover vegetables with cheese.
6. Sprinkle with grated parmessan cheese.
7. Cook in 350° over for around 30 minutes. Obviously check every 10 mins.


I hope you enjoy it and please let me know how it went if you make it :)

Sunday, November 05, 2006

foodie

Well, after taking pretty much forever to write a second entry, I´ve decided the direction I want to take. No, I don´t mean with my life, I´m pretty far of figuring that one out, but with this blog... if we can call it that.

Since moving out on my own last August, I´ve explored my love for cooking even further. See, I have always been a cookie-brownie person. So I rarely cooked savory food, that was my mom´s job. Nowadays, with no one around to do it, I have been experimenting with different flavors and getting some pretty good results. With my friends as my personal guinea pigs, I´ve been getting rave reviews so far.

So I´ve decided to contribute to the densely populated ranks of food bloggers... though I still plan on writing about life in general or whatever suits my fancy when I feel like it.

So get ready for muffins, brownies and endless amounts of quiches, veggie dishes and Asian food... hope you enjoy the ride. I´m hoping to learn a lot and explore different flavors with all of you.

Here are a few pictures...

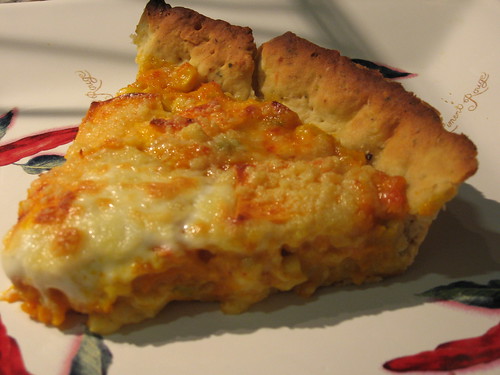
pumpkin, corn and cheese pie

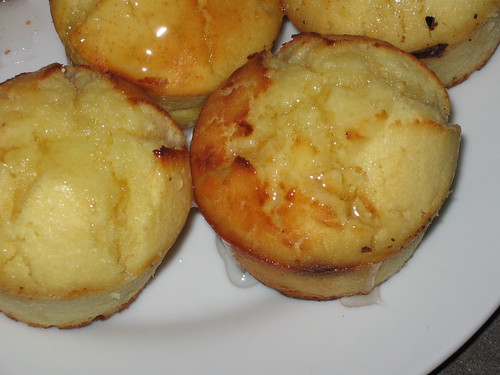
lemon cake... adapted into muffins

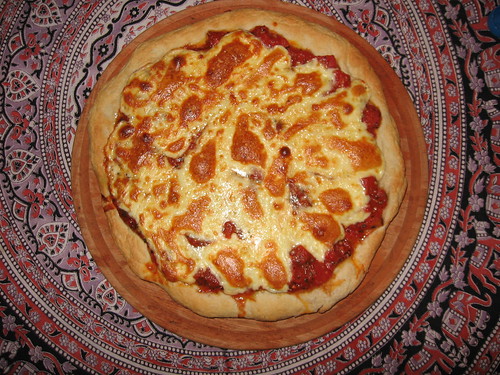
pizza

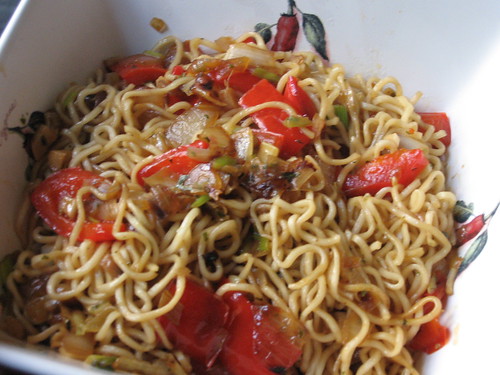
mmmm noodles